
Set up a course
A block of sessions people sign up for together, like a six-week beginner course, with the option to sell single drop-in spots as well.
- Step 1
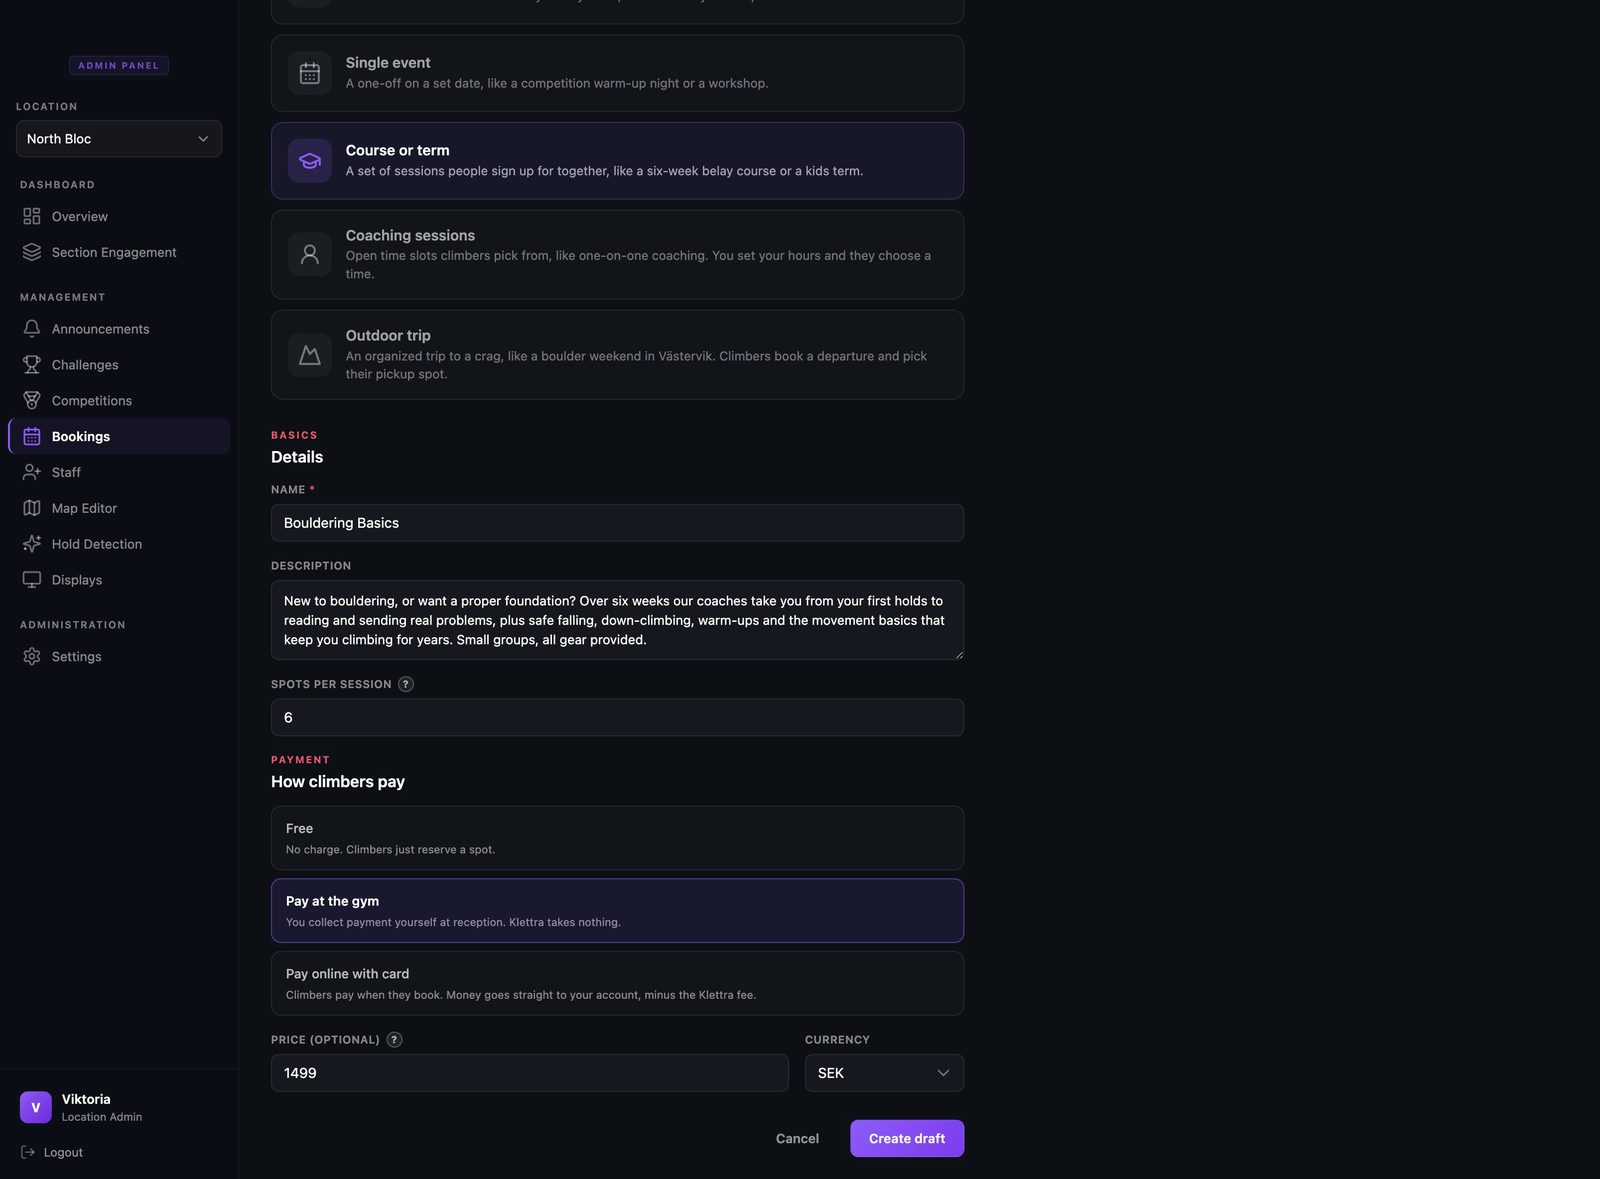
Choose Course or term
Start a new booking item and pick Course or term. This is the type where a climber books the whole block at once and keeps a spot in every session.
- Step 2
Add the dated sessions
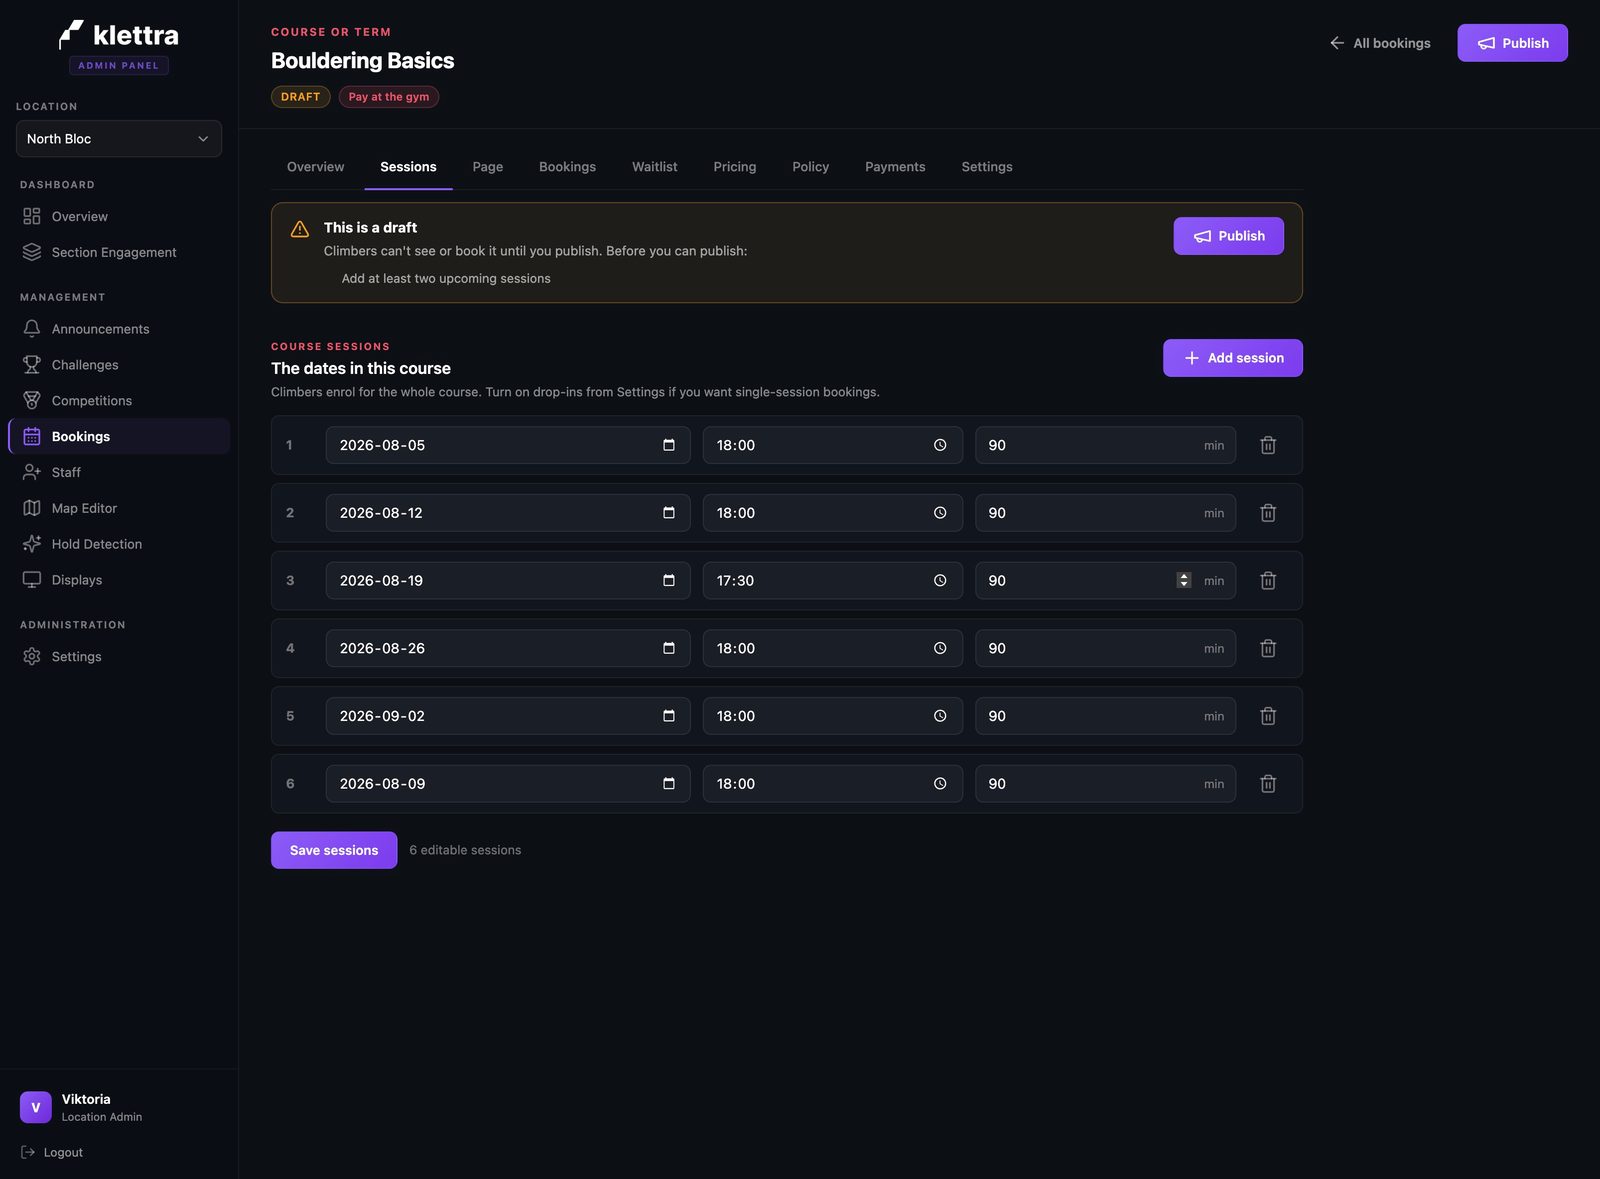
On the Sessions tab, add each session with its own date and time. A course needs at least two sessions before it can go live. Each session can carry its own start time, so an earlier start for one week is no problem.
- Step 3
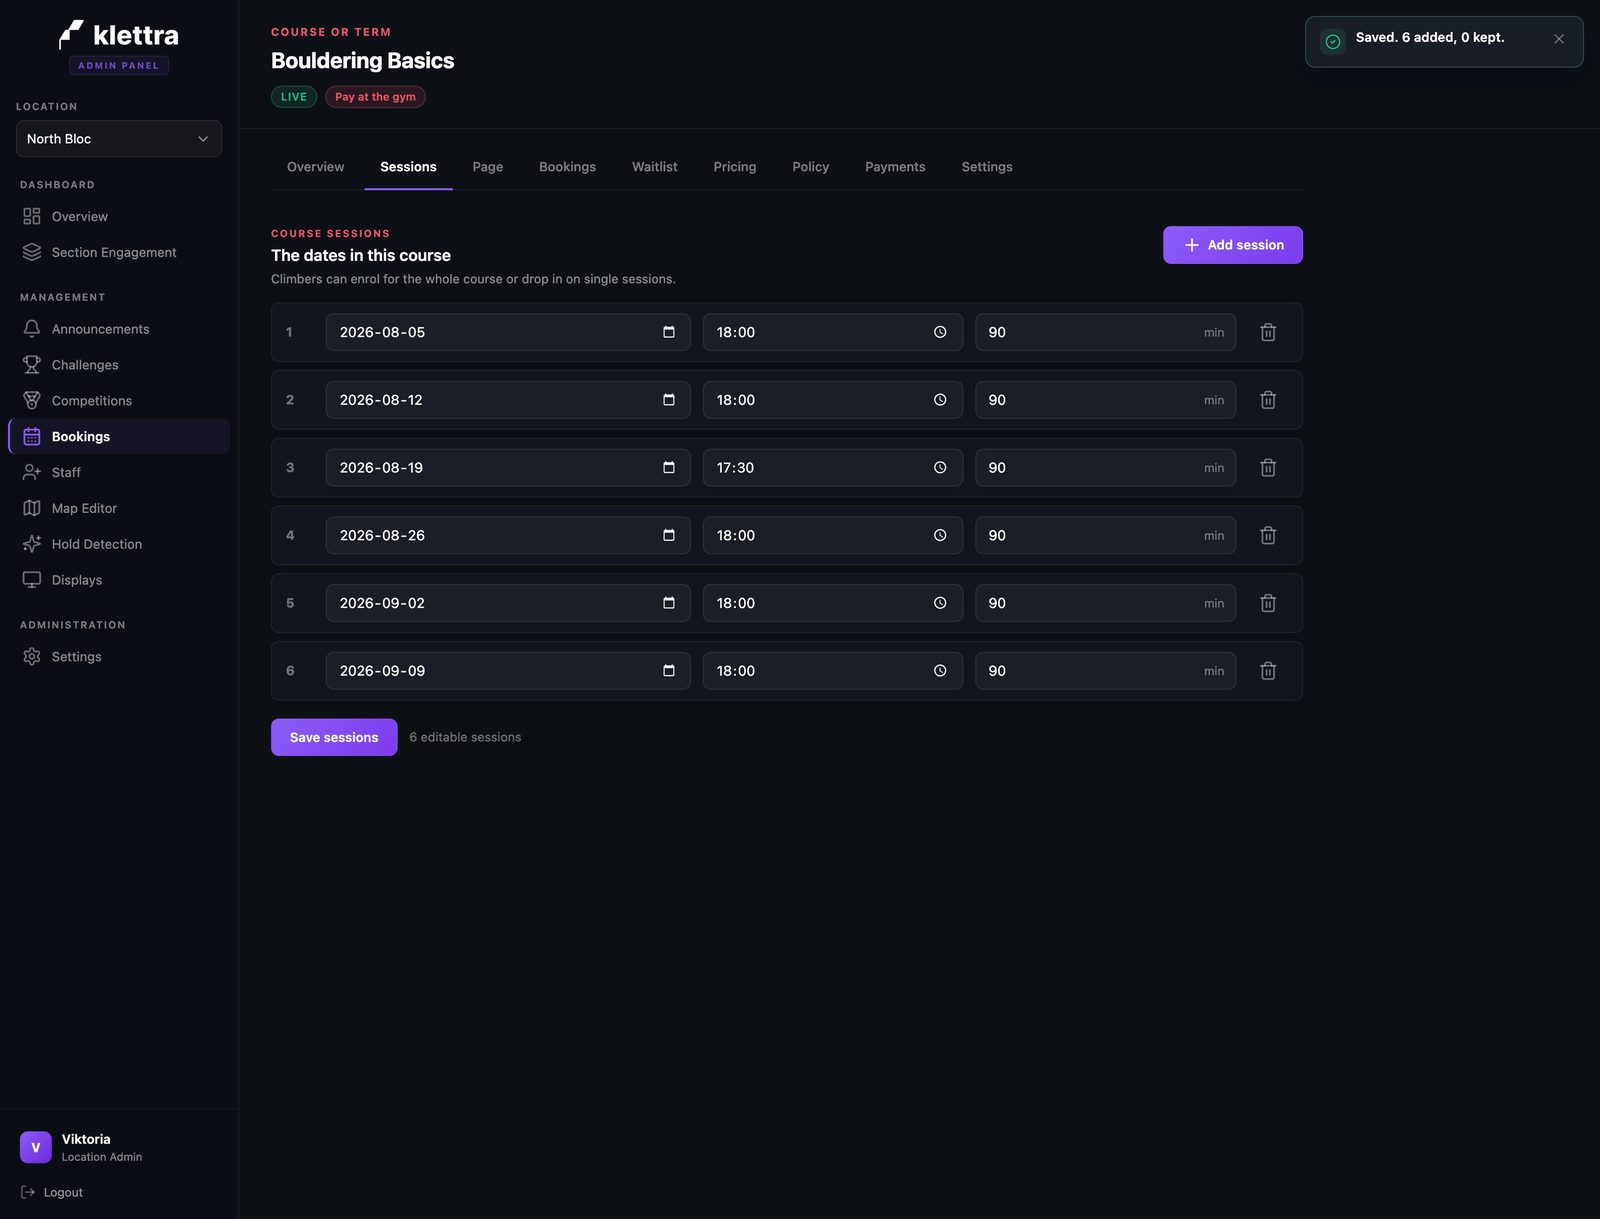
Review the full list
The saved list shows the whole course in order, numbered from the first session to the last. If you move a date, the numbering re-sorts itself, so a session that shifts to the end becomes the last one automatically.
- Step 4
Offer drop-ins if you want them
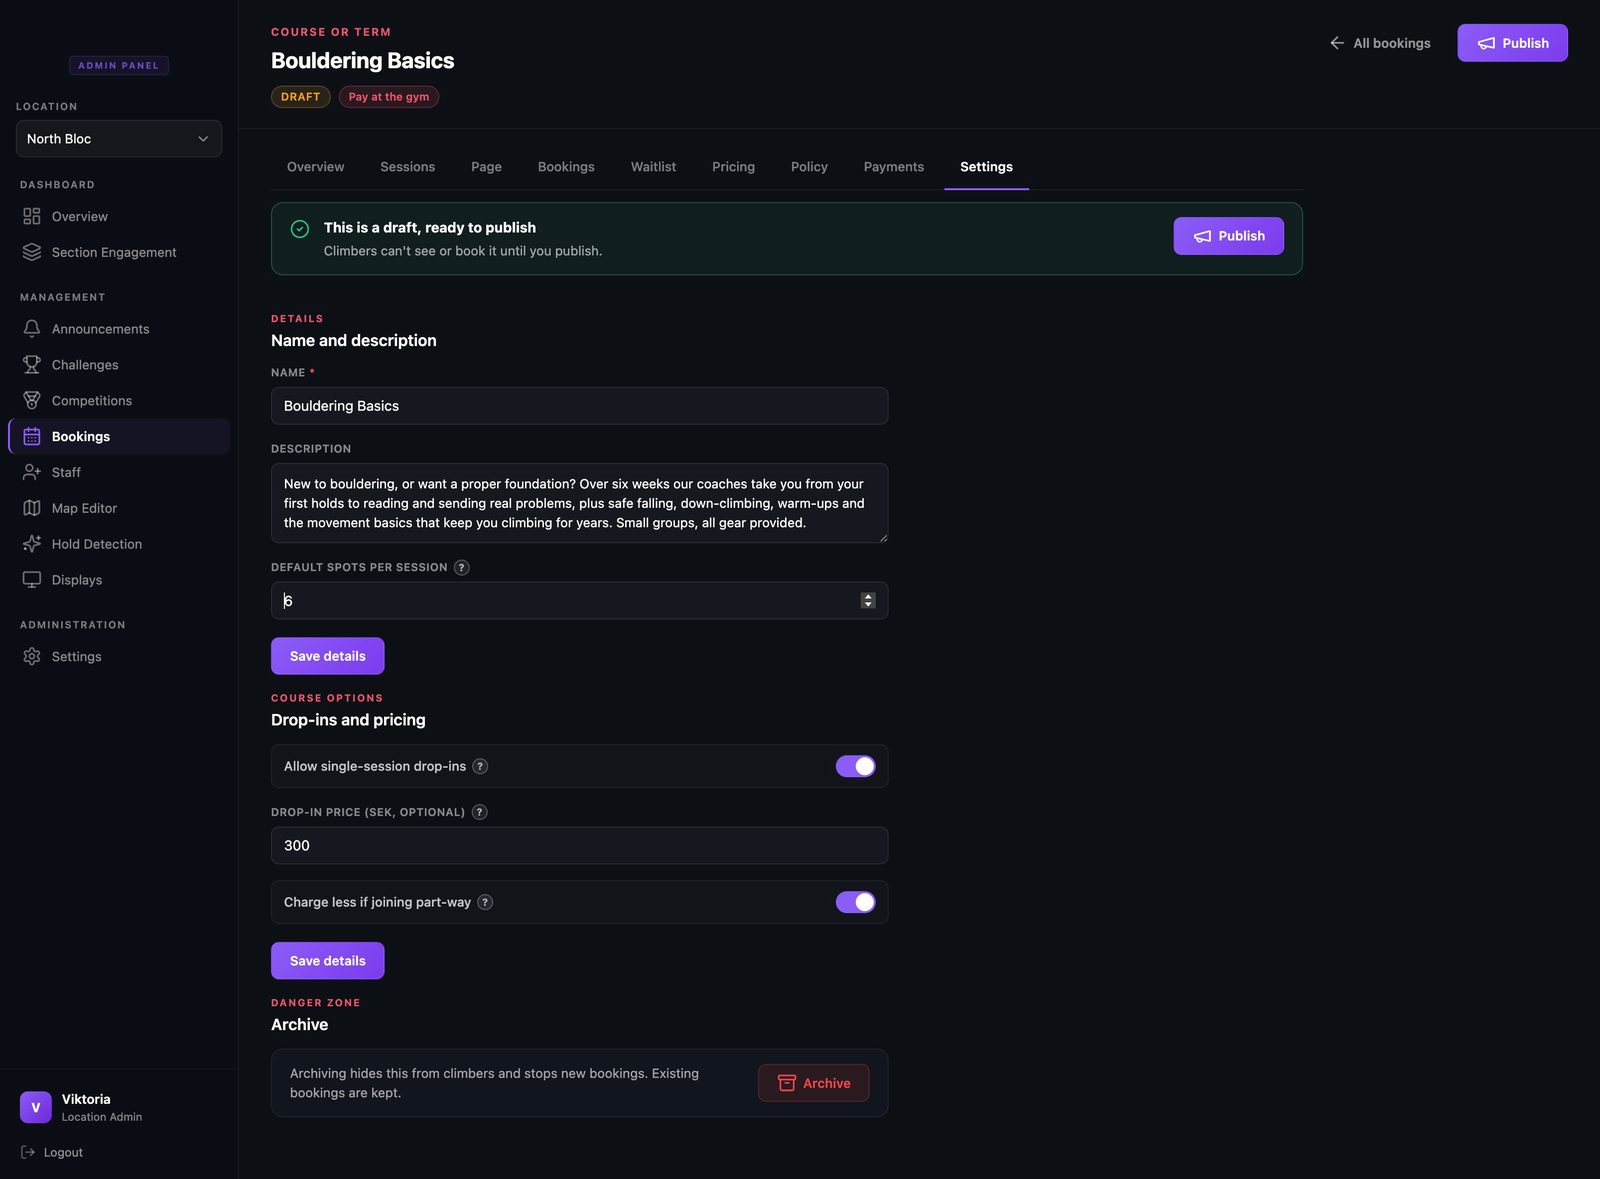
In Settings, open Course options. You can let people buy a single drop-in spot for one session instead of the whole course, and you can charge a reduced amount for climbers who join after the course has already started. Both are optional and off until you turn them on.
- Step 5
See the public course page
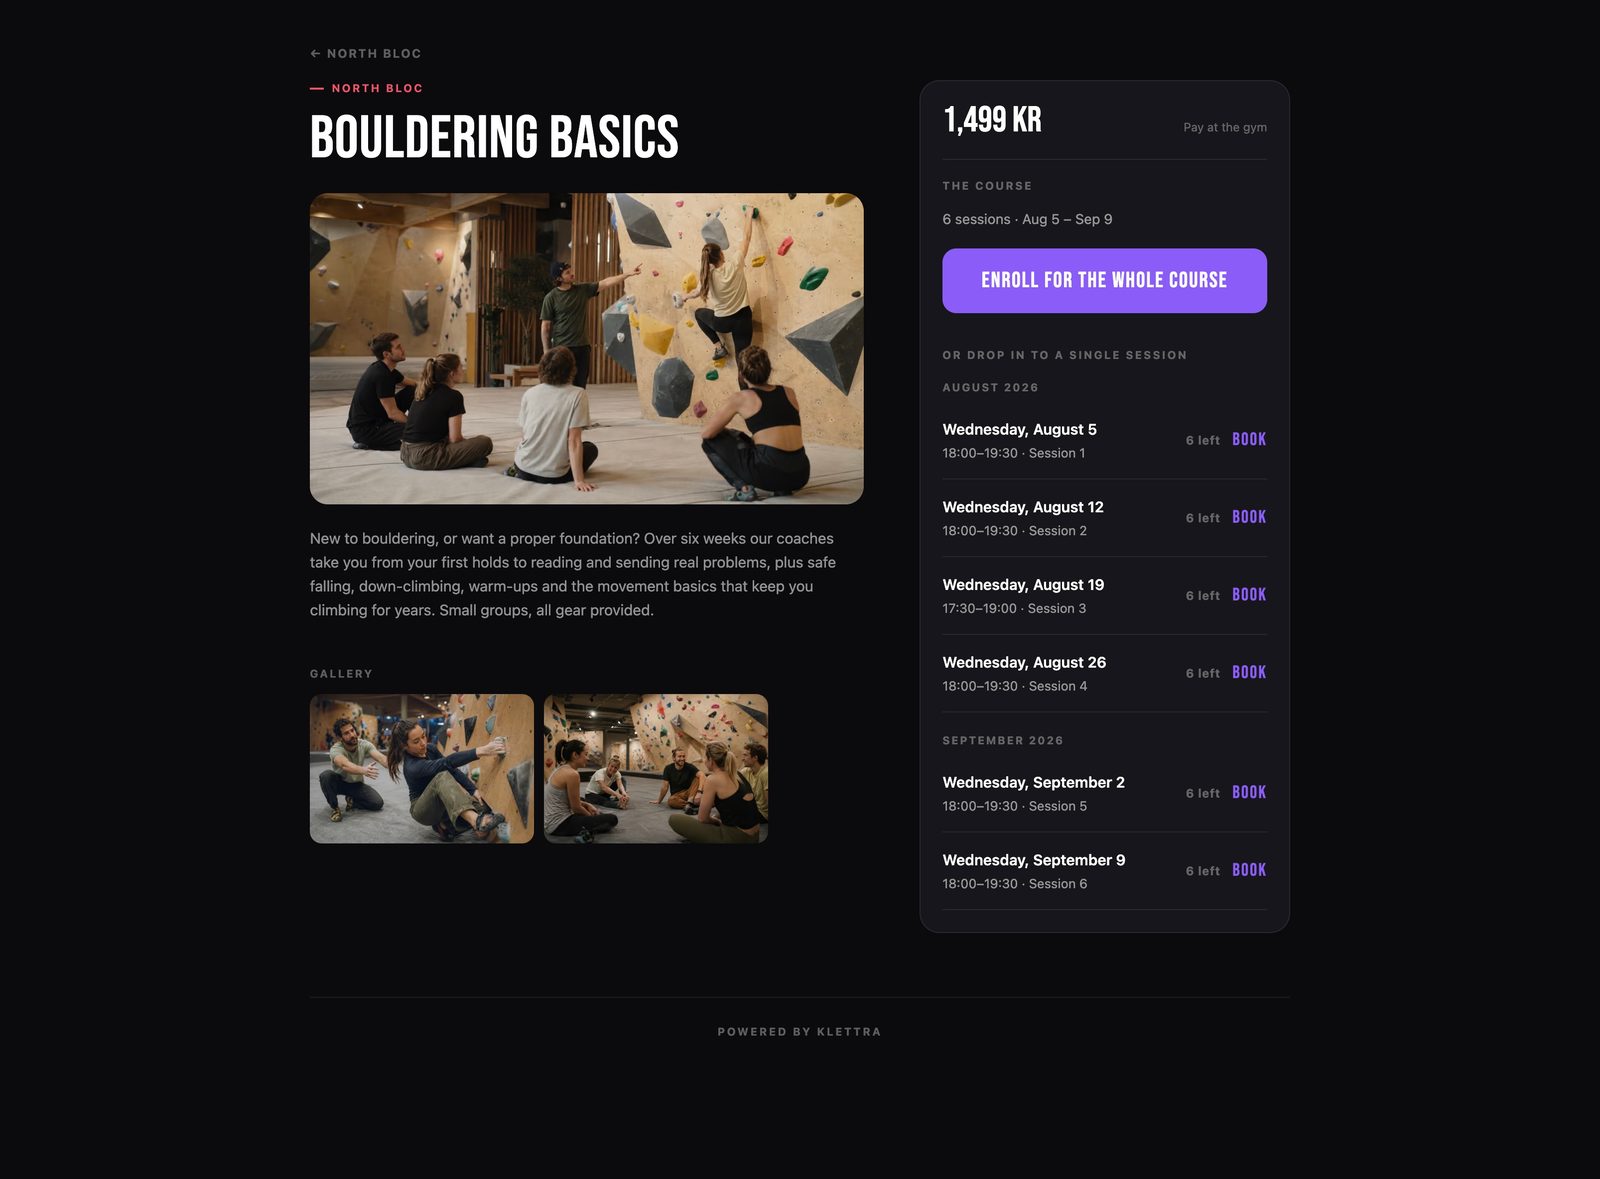
The published page leads with Enroll for the whole course and lists every date so climbers can see the full run. If you turned on drop-ins, each session also has its own Book option underneath, each with its own time.
That is the whole flow
The same few steps set up every kind of booking. Browse the rest of the guides, or see how bookings work end to end.