
Publish your first class
Set up a class that repeats every week, add photos and a short description, and get a booking link you can share. This is the flow you will use for almost everything else.
- Step 1
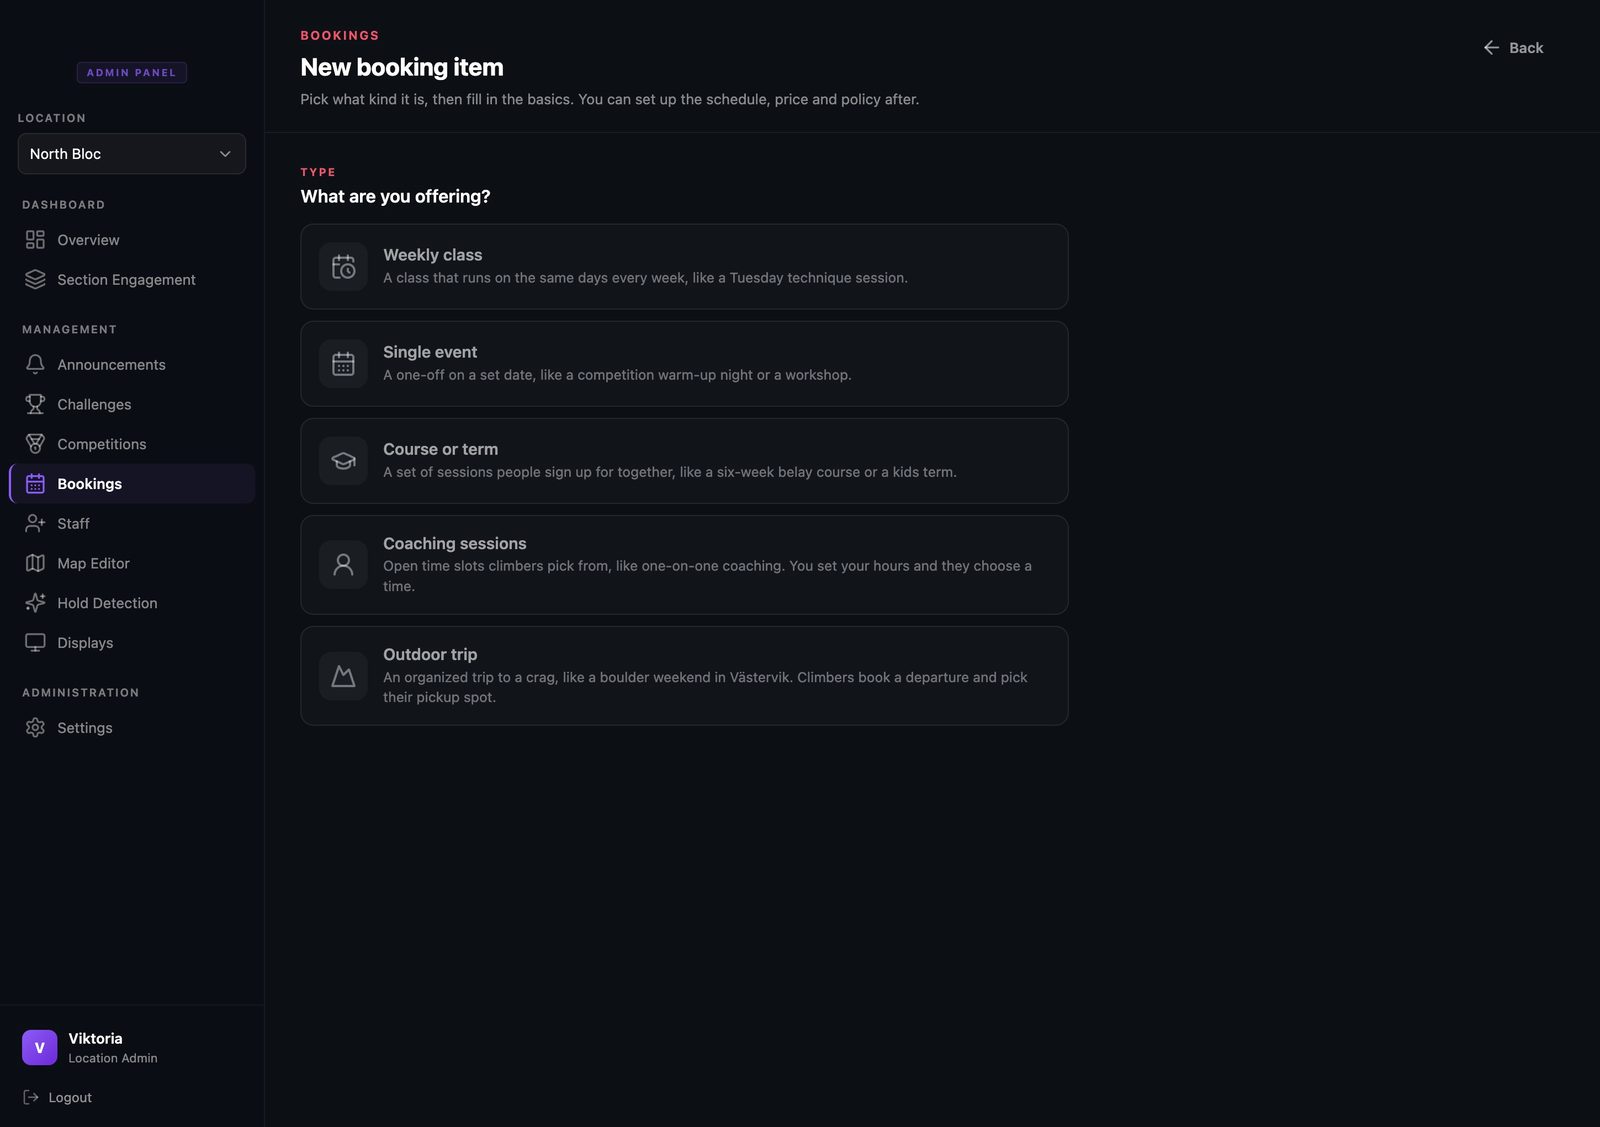
Open Bookings and pick what you are offering
In the admin panel, open Bookings and start a new item. The first question is a plain one: what are you offering? You get five options, each described in everyday language. For something that runs on the same days every week, choose Weekly class.
- Step 2
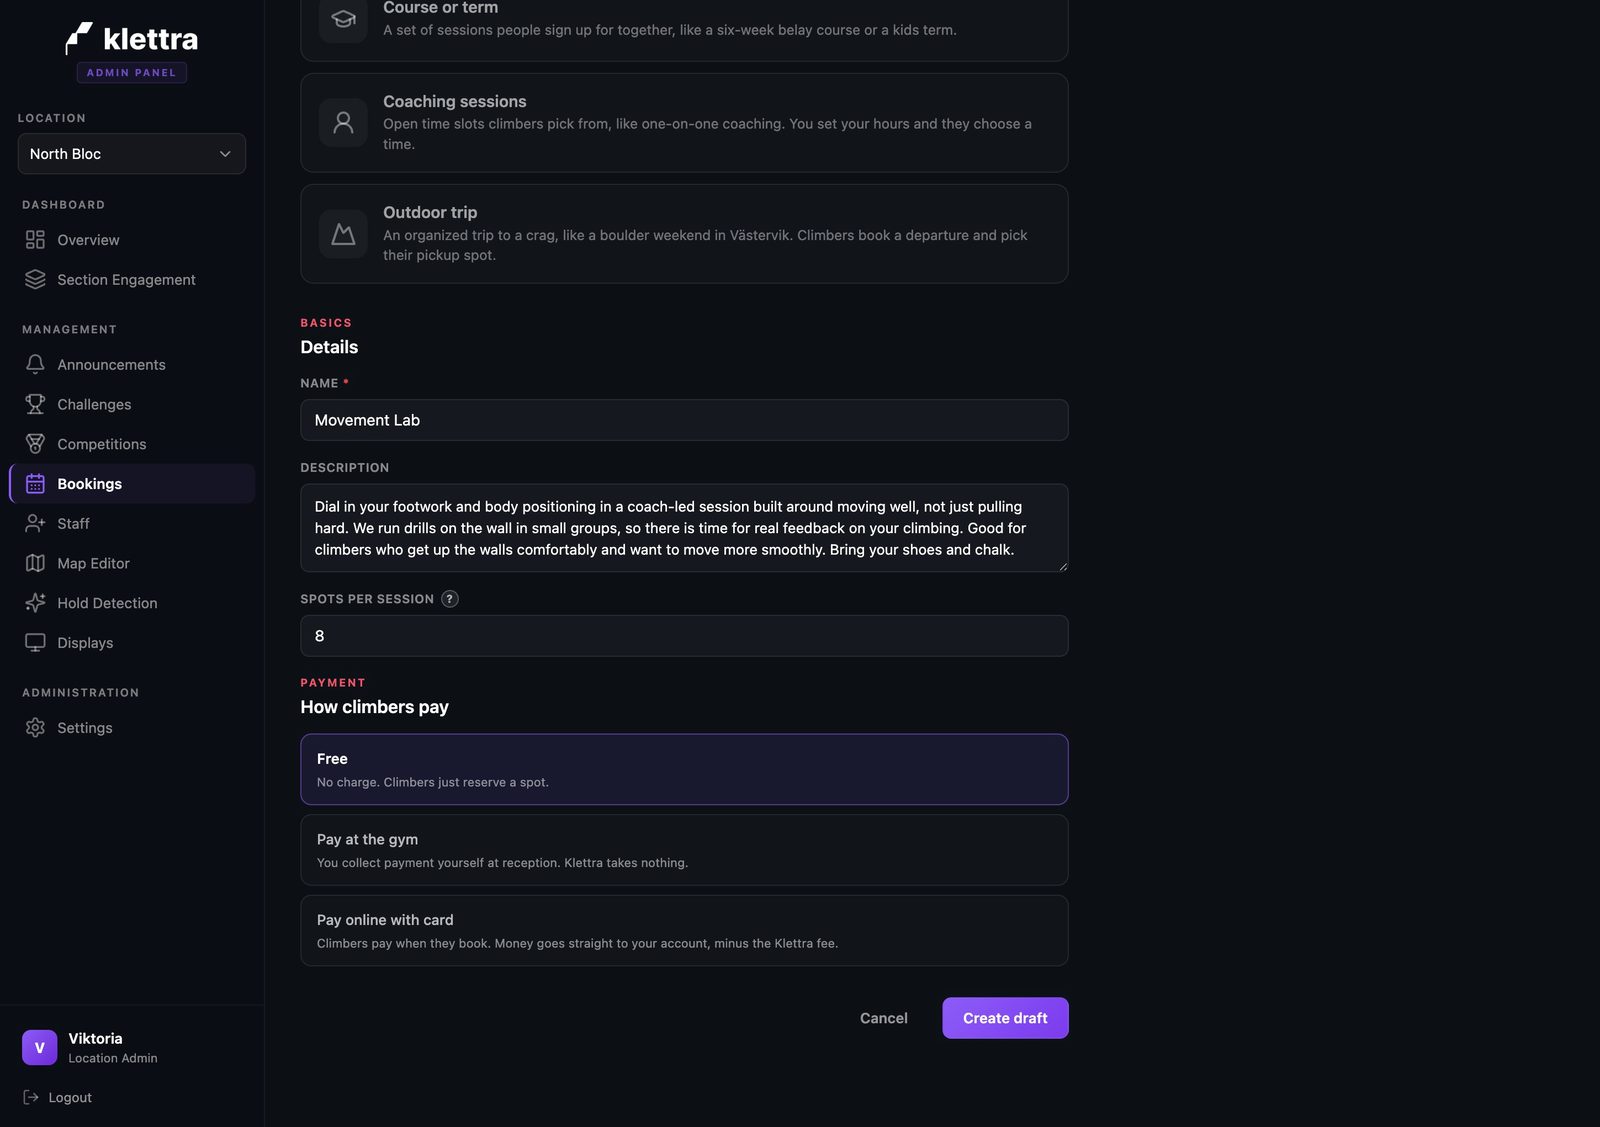
Fill in the basics
Give the class a name, write a short description, and set how many spots each session has. Then choose how people pay: free, pay at the gym, or pay online. Free and pay-at-the-gym classes cost you nothing to run and need no payment setup. Save it when you are done.
- Step 3
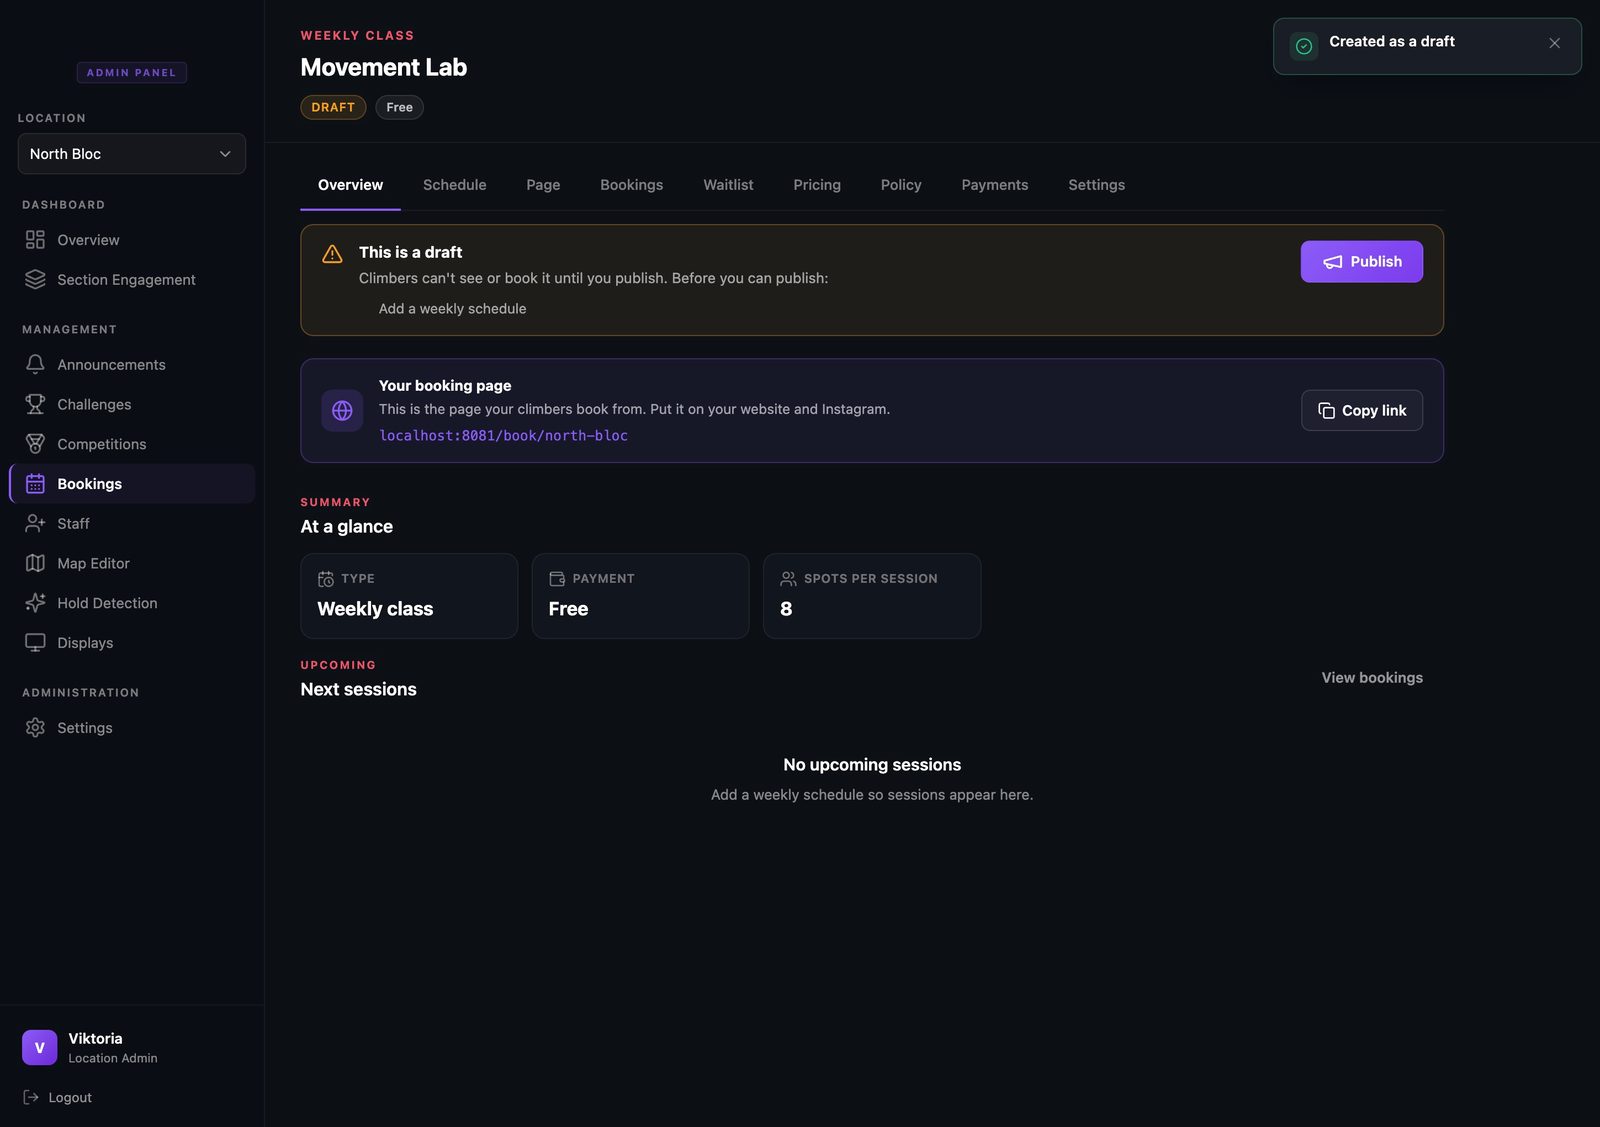
Your class starts as a draft
A new item is a draft, so climbers cannot see it yet. The overview shows a short checklist of what is left before it can go live, and your booking page link is ready right here, so you can put it on your website and your social channels once it is published.
- Step 4
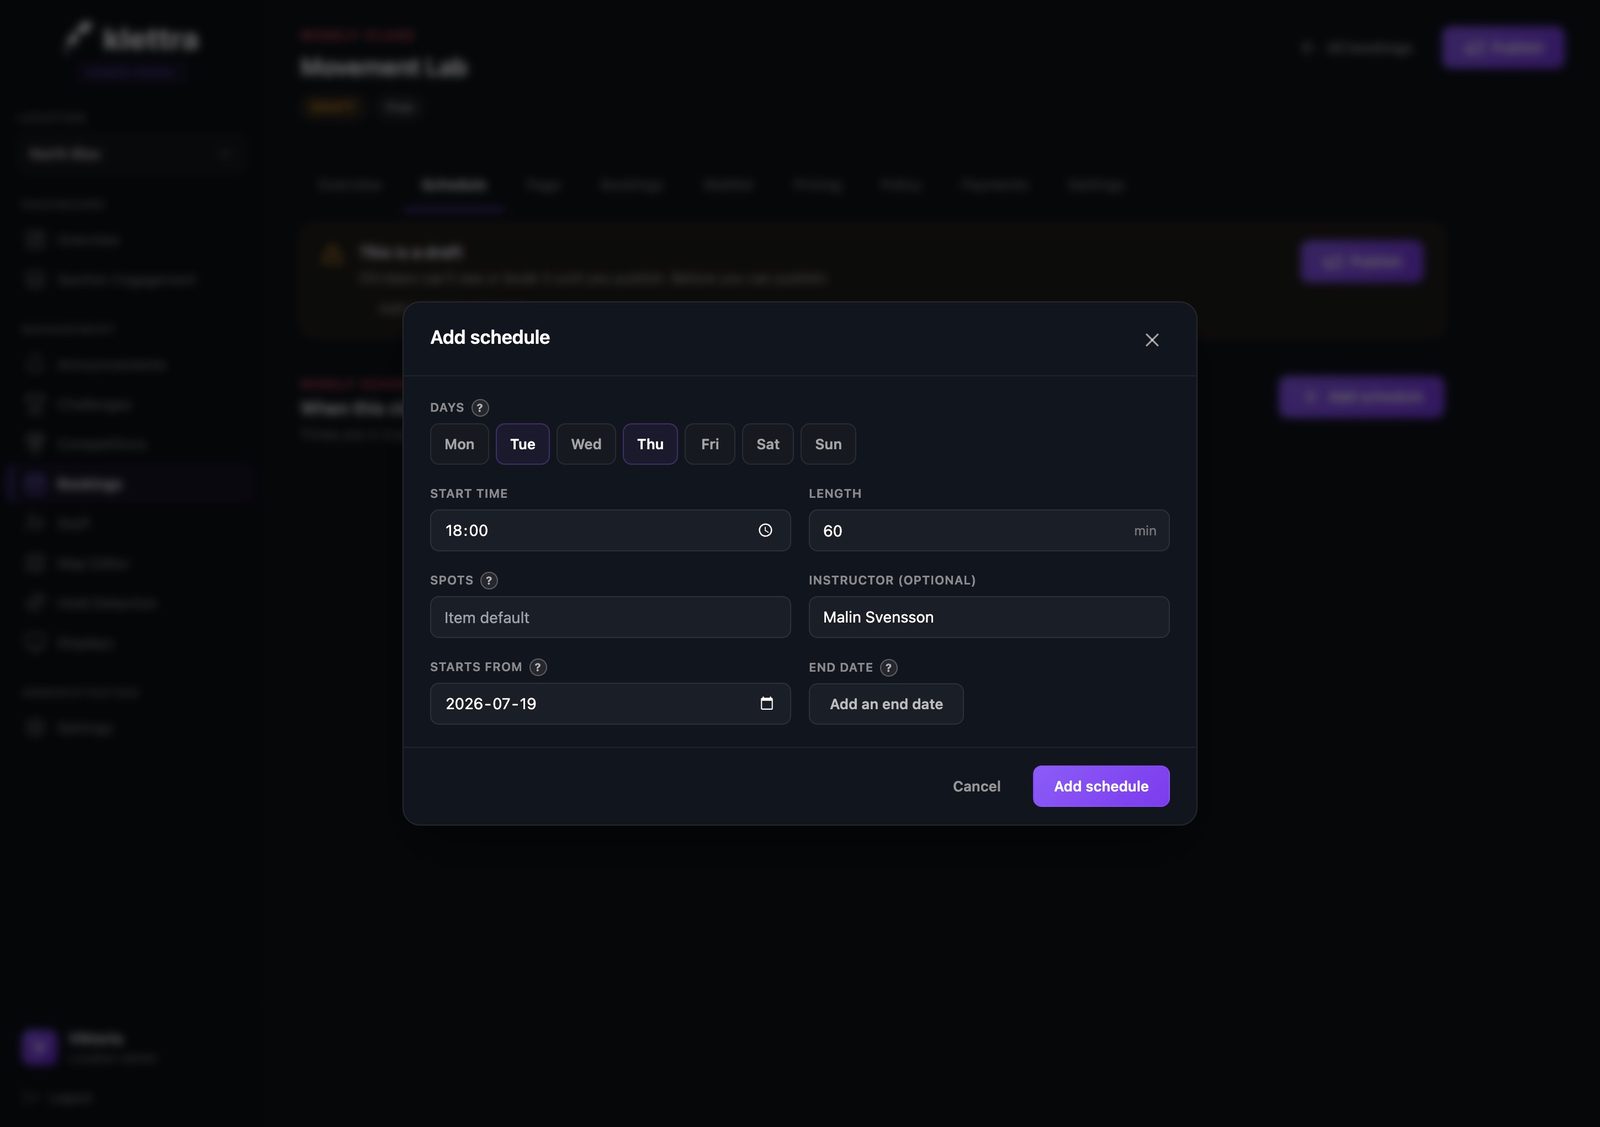
Add the weekly schedule
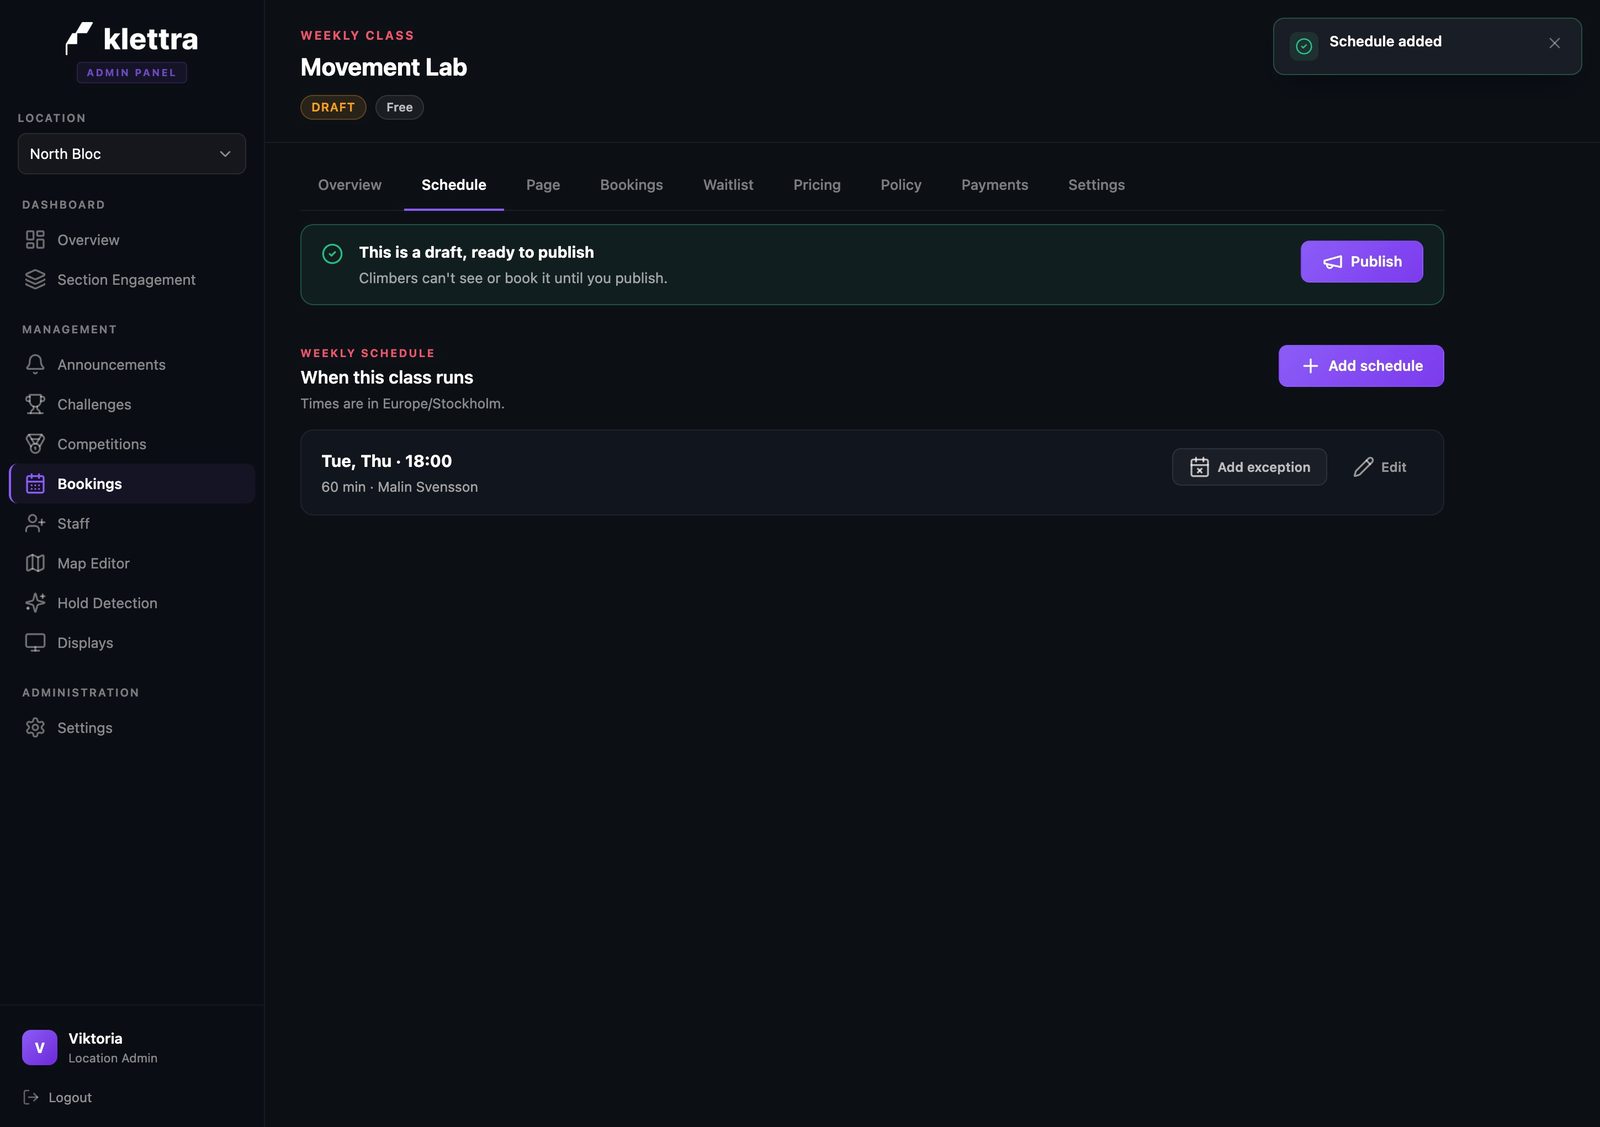
Open the Schedule tab and describe the weekly pattern once. Tick the days it runs, set a start time and a length, and name the instructor if you like. Pick a date for it to start from. You set the pattern one time and every session is created for you.
- Step 5
Watch the checklist clear
As soon as a schedule exists, the warning turns green and the class is ready to publish. The rule shows as a tidy summary of the days, the time, the length, and the instructor, so you can check it at a glance.
- Step 6
Add photos and a short story
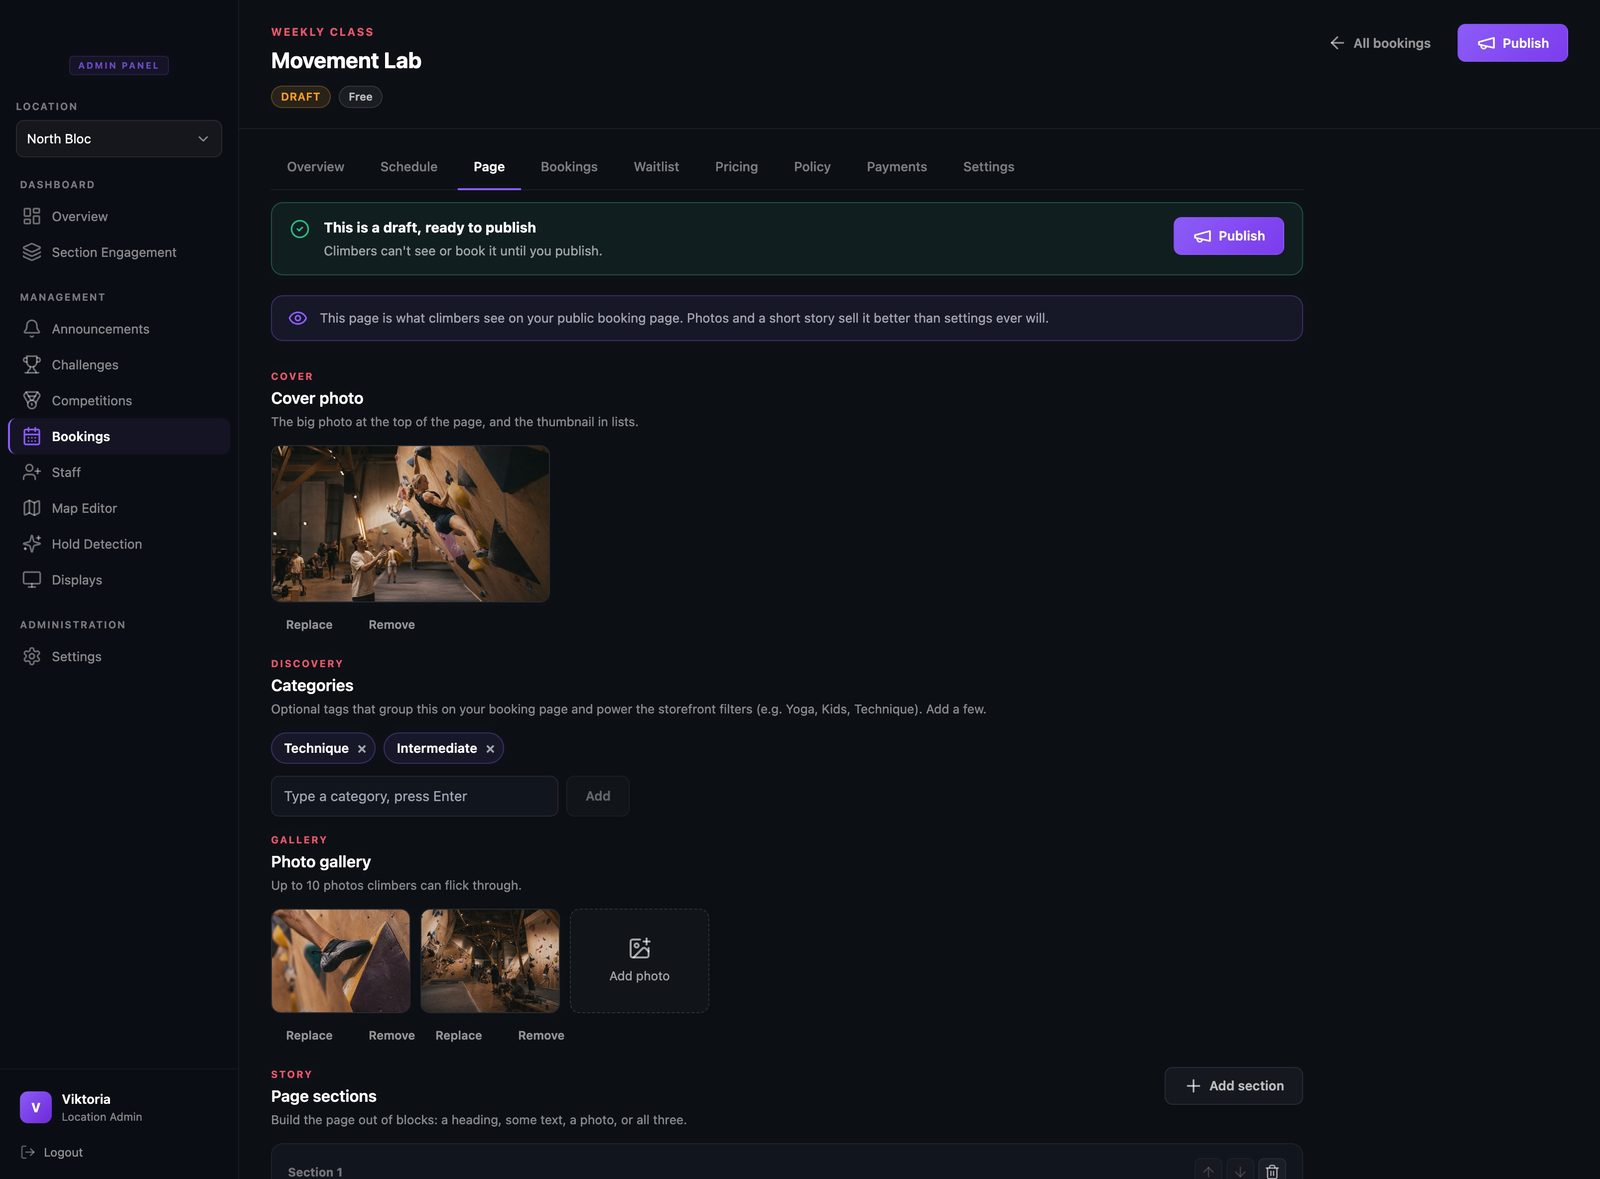
On the Page tab, add a cover photo, a few gallery shots, and a short section or two about what the session is really like. Add category tags such as Technique or Intermediate. This is the page climbers land on, so a good photo and a couple of honest lines do a lot of the selling.
- Step 7
Publish when it is ready
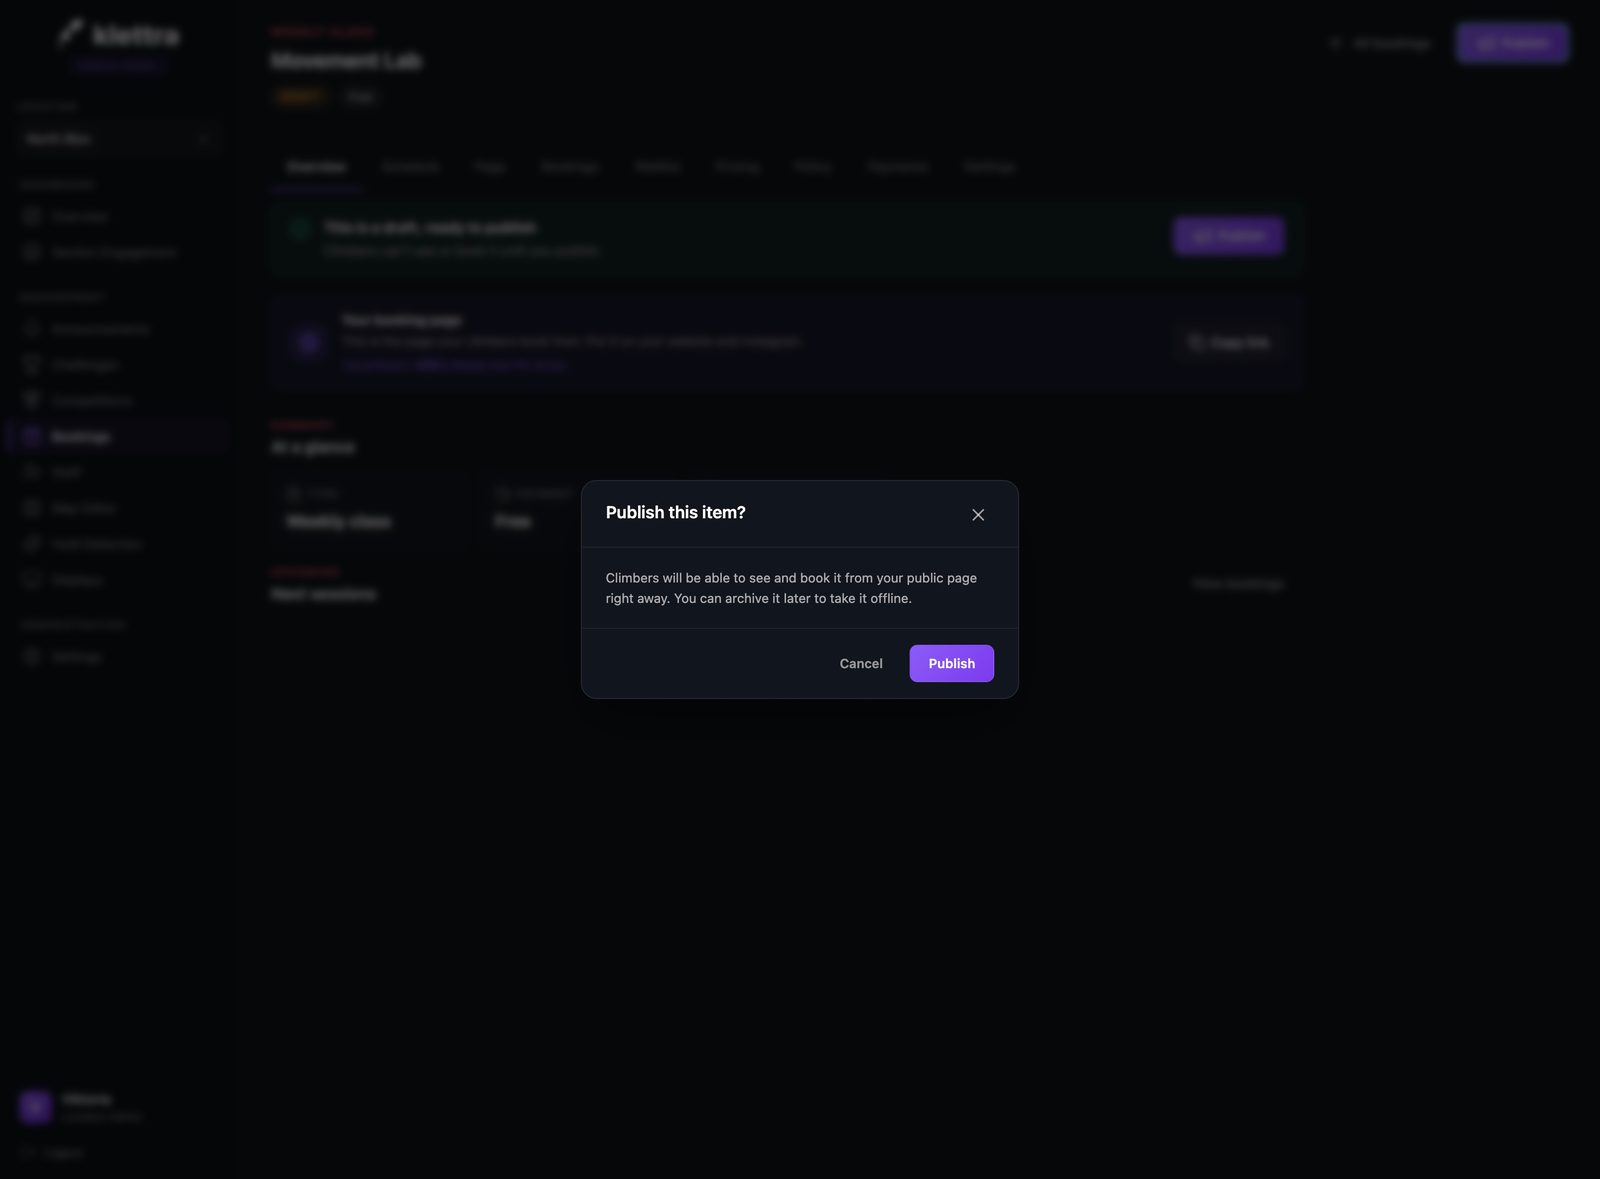
Going live is a deliberate step, so nothing is public by accident. Confirm the dialog and the class is live.
- Step 8
Your class is live
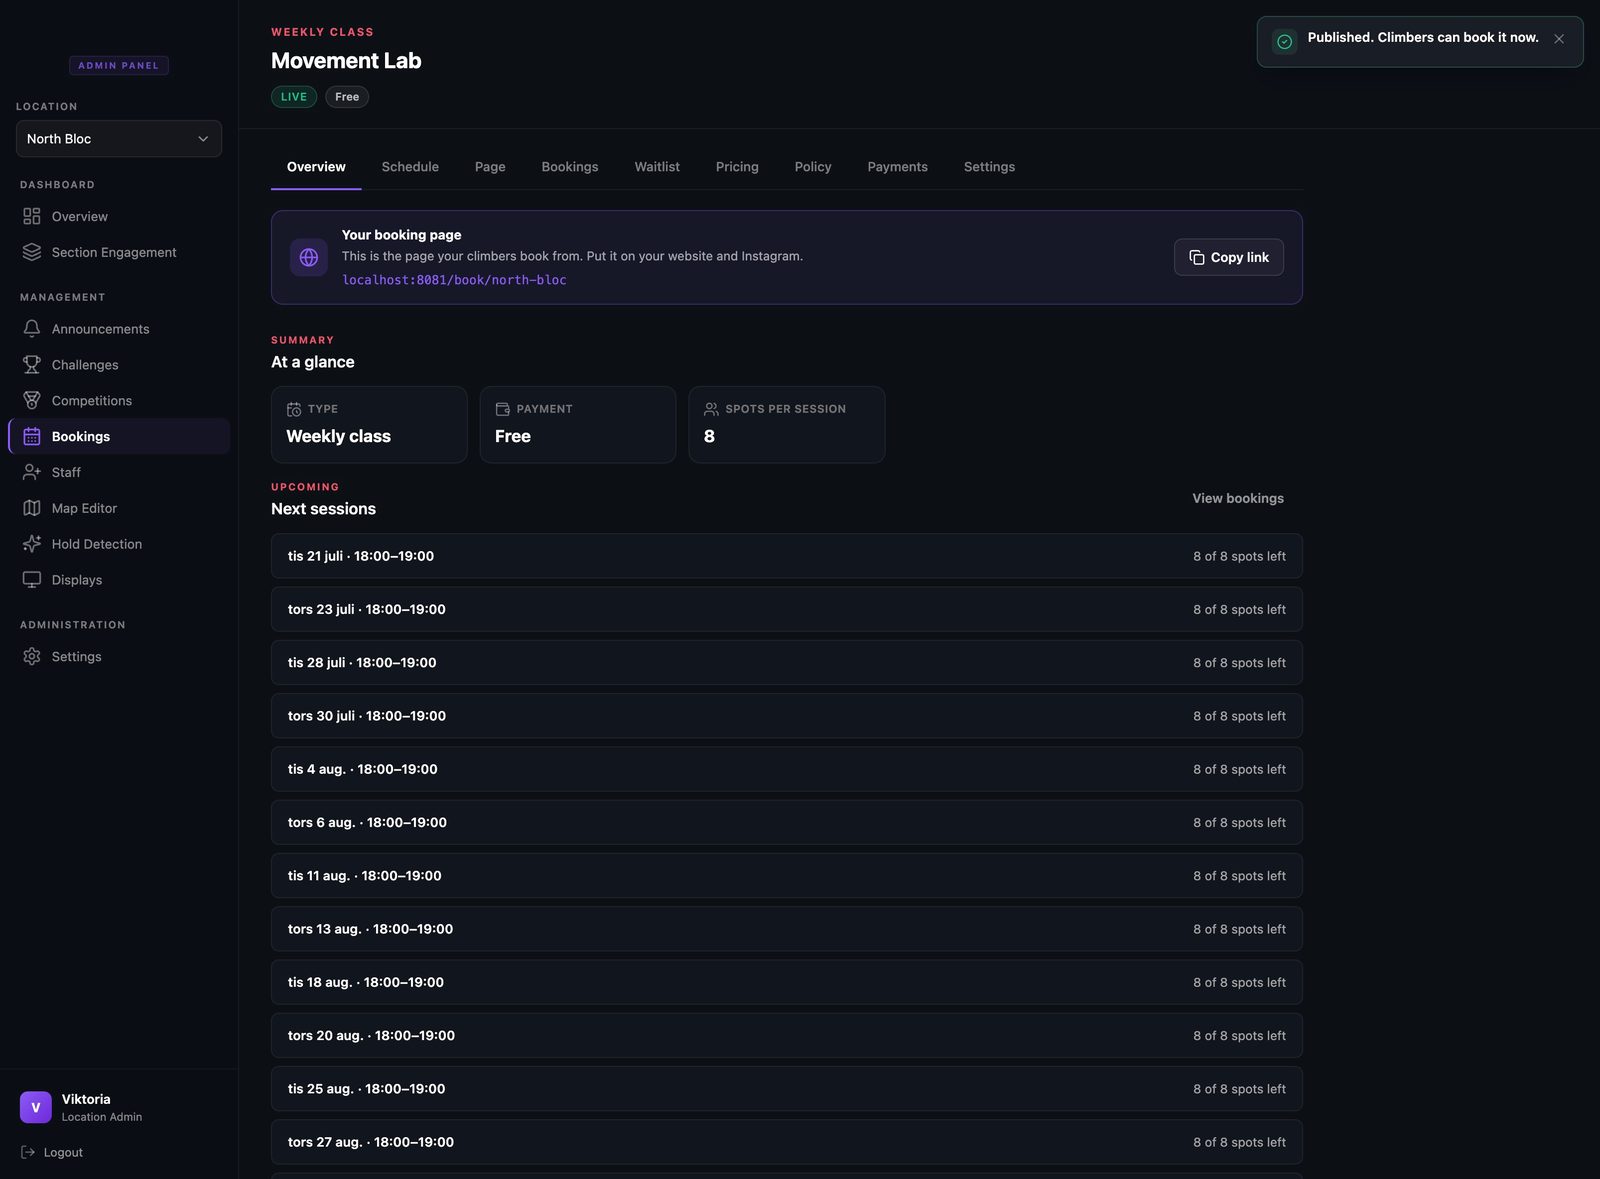
The moment you publish, every session is created and open for booking. The overview lists the upcoming dates, each showing how many spots are still open, so you can see the whole run in one place.
- Step 9
See the page climbers get
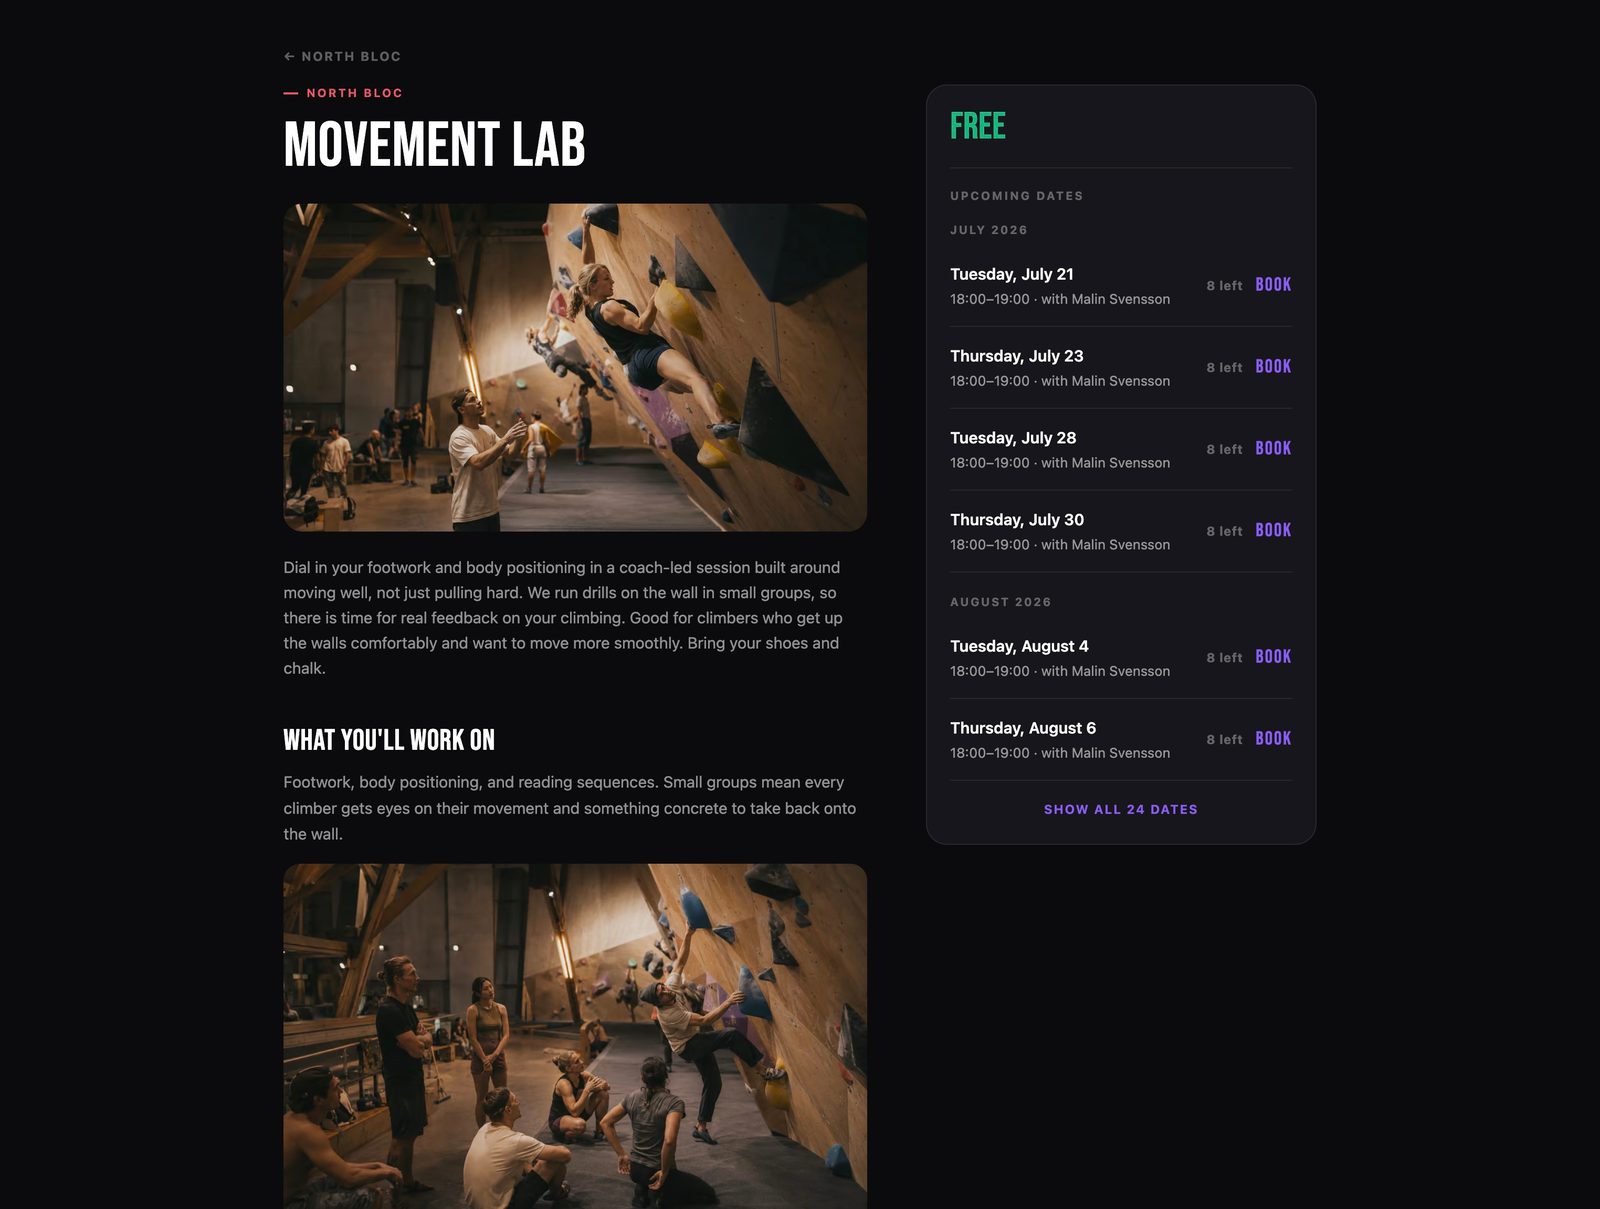
This is what opens when someone follows your link: the cover photo, your description, the upcoming dates with the instructor and spots left, and a clear Book button. Share the link anywhere you reach your climbers.
That is the whole flow
The same few steps set up every kind of booking. Browse the rest of the guides, or see how bookings work end to end.