
How climbers book
The one link you share, and what climbers do with it. Here is what they see, how they book, how they check in, and how they manage a spot without ever making an account.
- Step 1
Everything you offer, on one page
Your booking page is the single link you share. It leads with a featured session and puts a search box and category chips right at the top, so a climber can jump to what they want. There is also a List and a Week view to switch between.
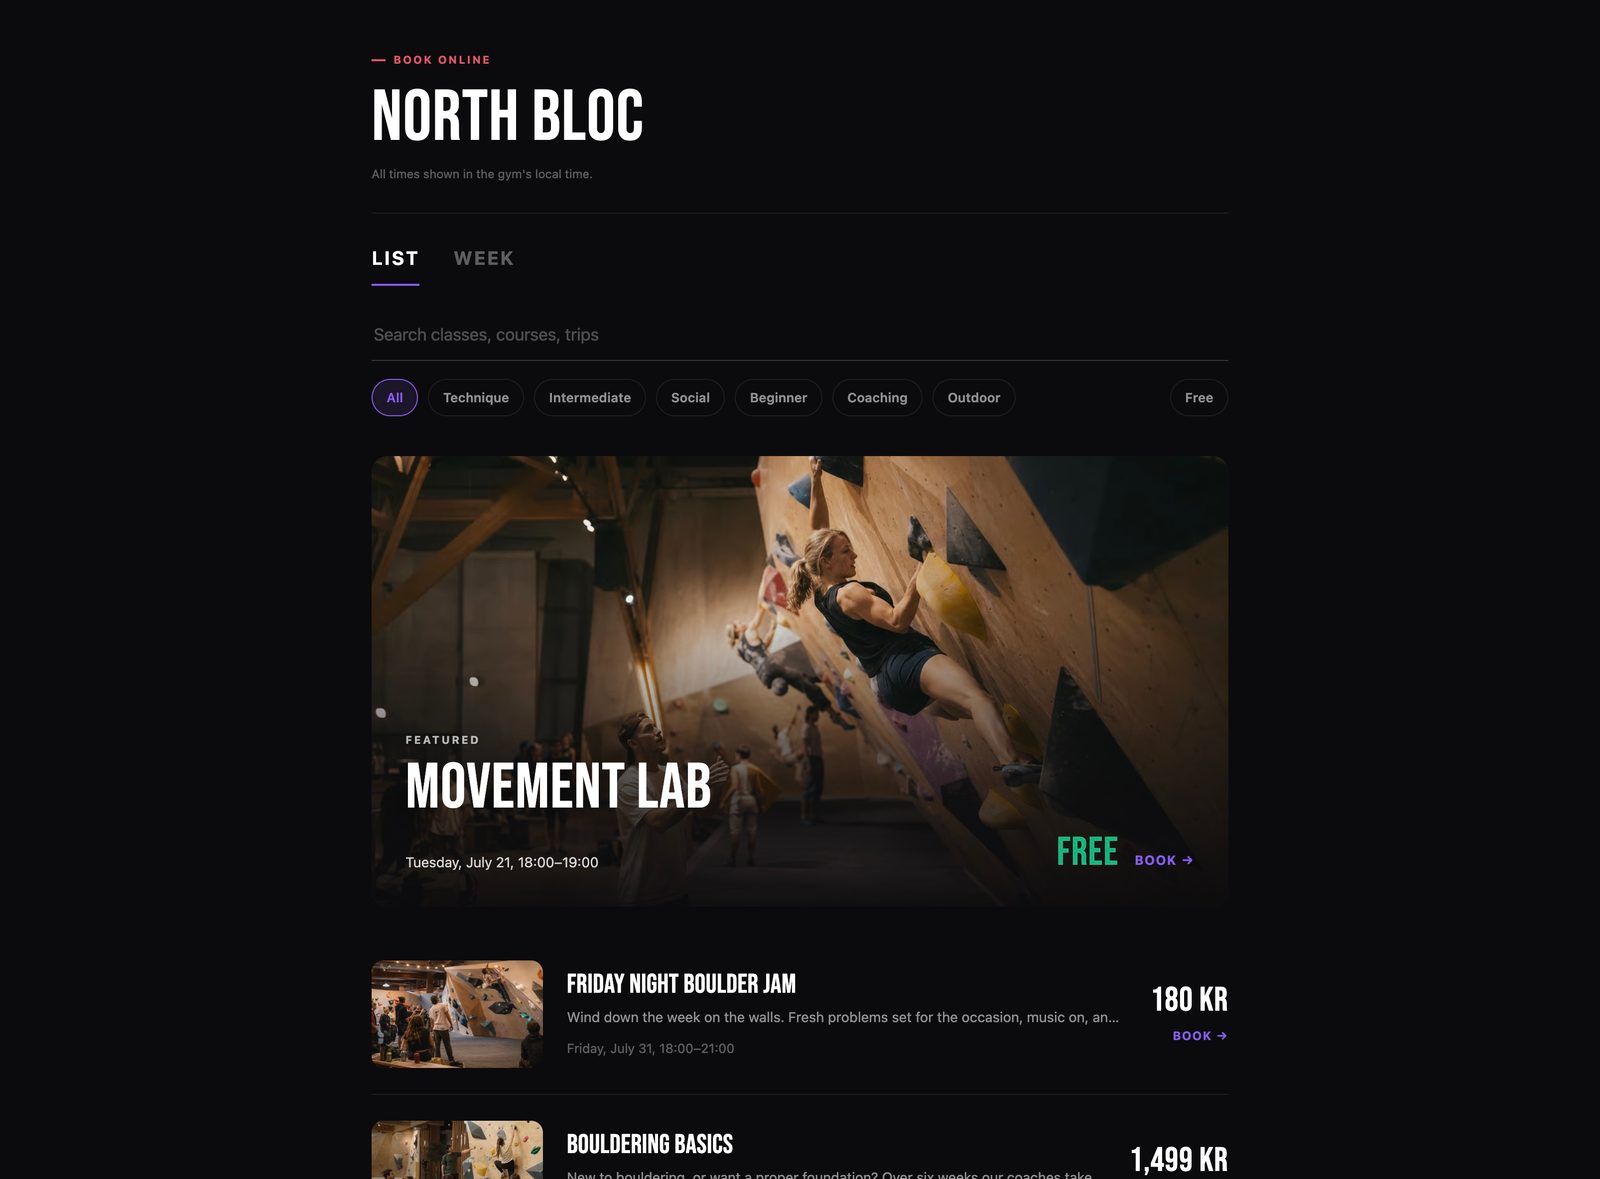
- Step 2
Classes, events, courses, trips, and coaching together
Below the featured session, everything you sell is listed in date order in one place: weekly classes, one-off events, courses, trips, and open coaching times. A climber sees the full breadth of what your gym runs without hunting through separate pages.
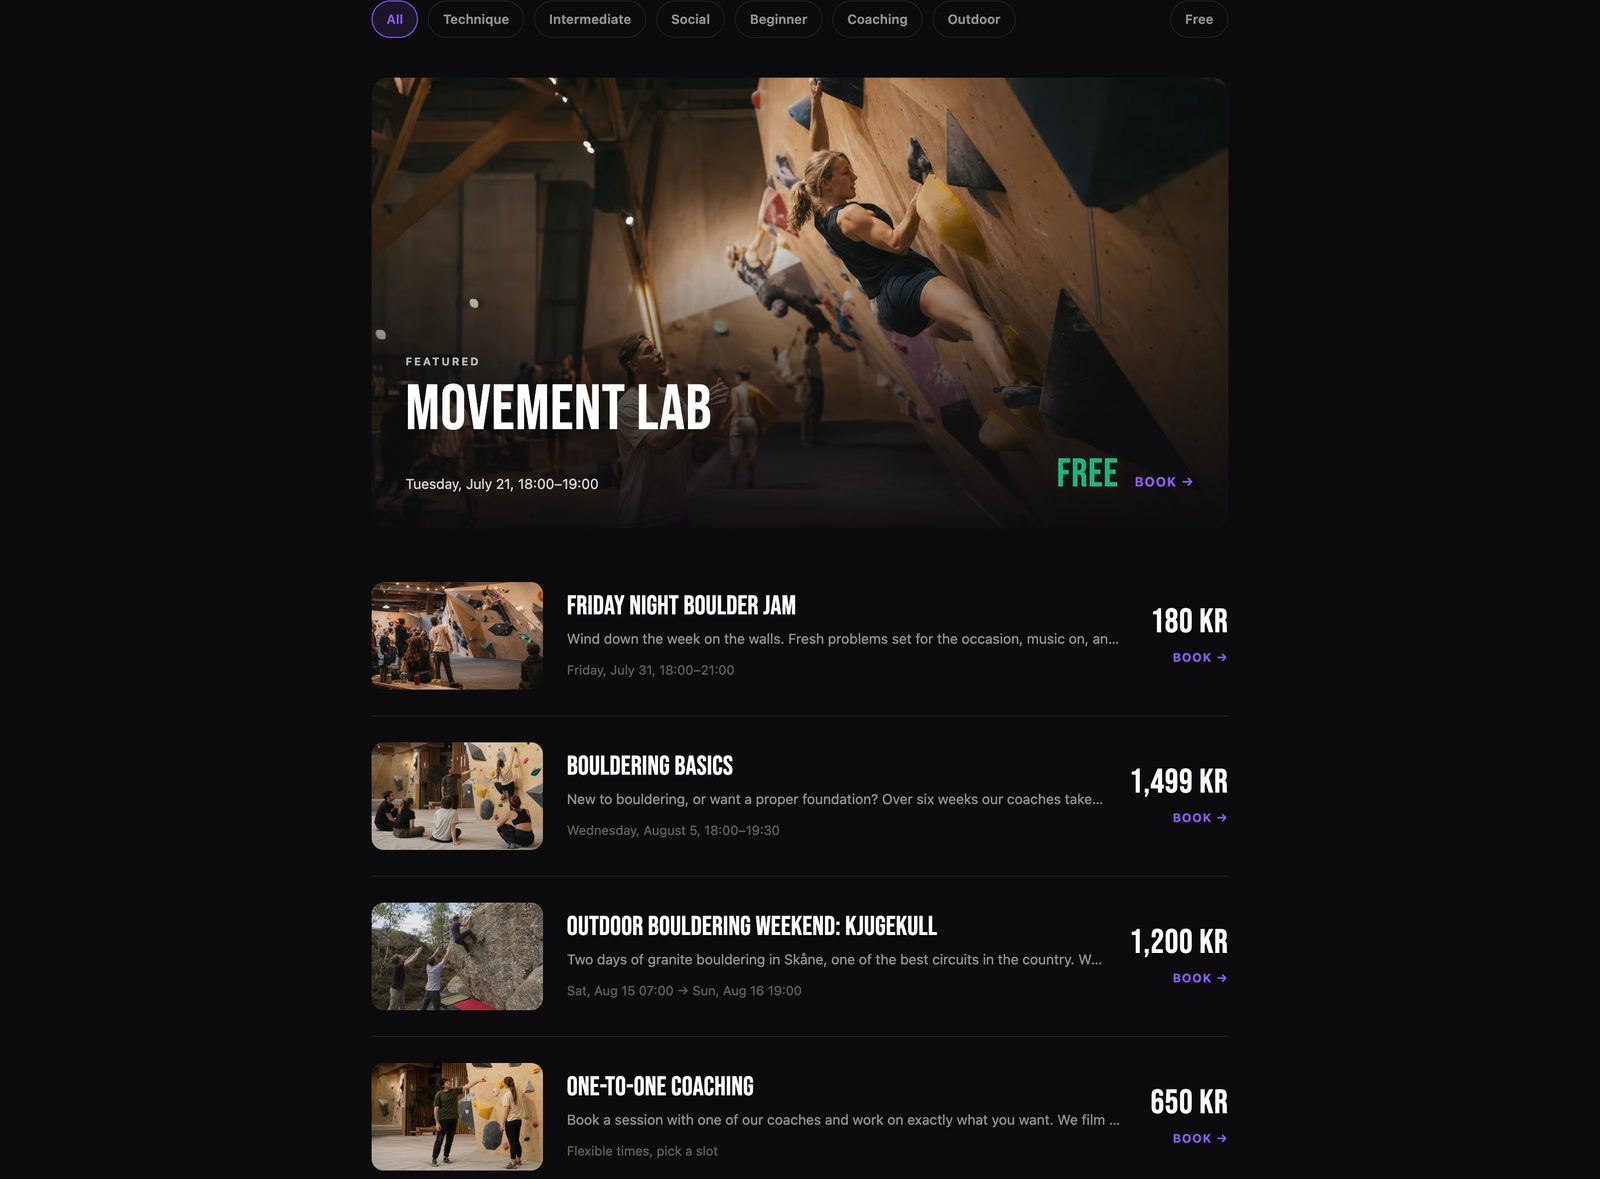
- Step 3
A week view for scanning
Some climbers prefer a timetable. The Week view lays out the days side by side so they can see what is on when, and quiet days are easy to spot at a glance.
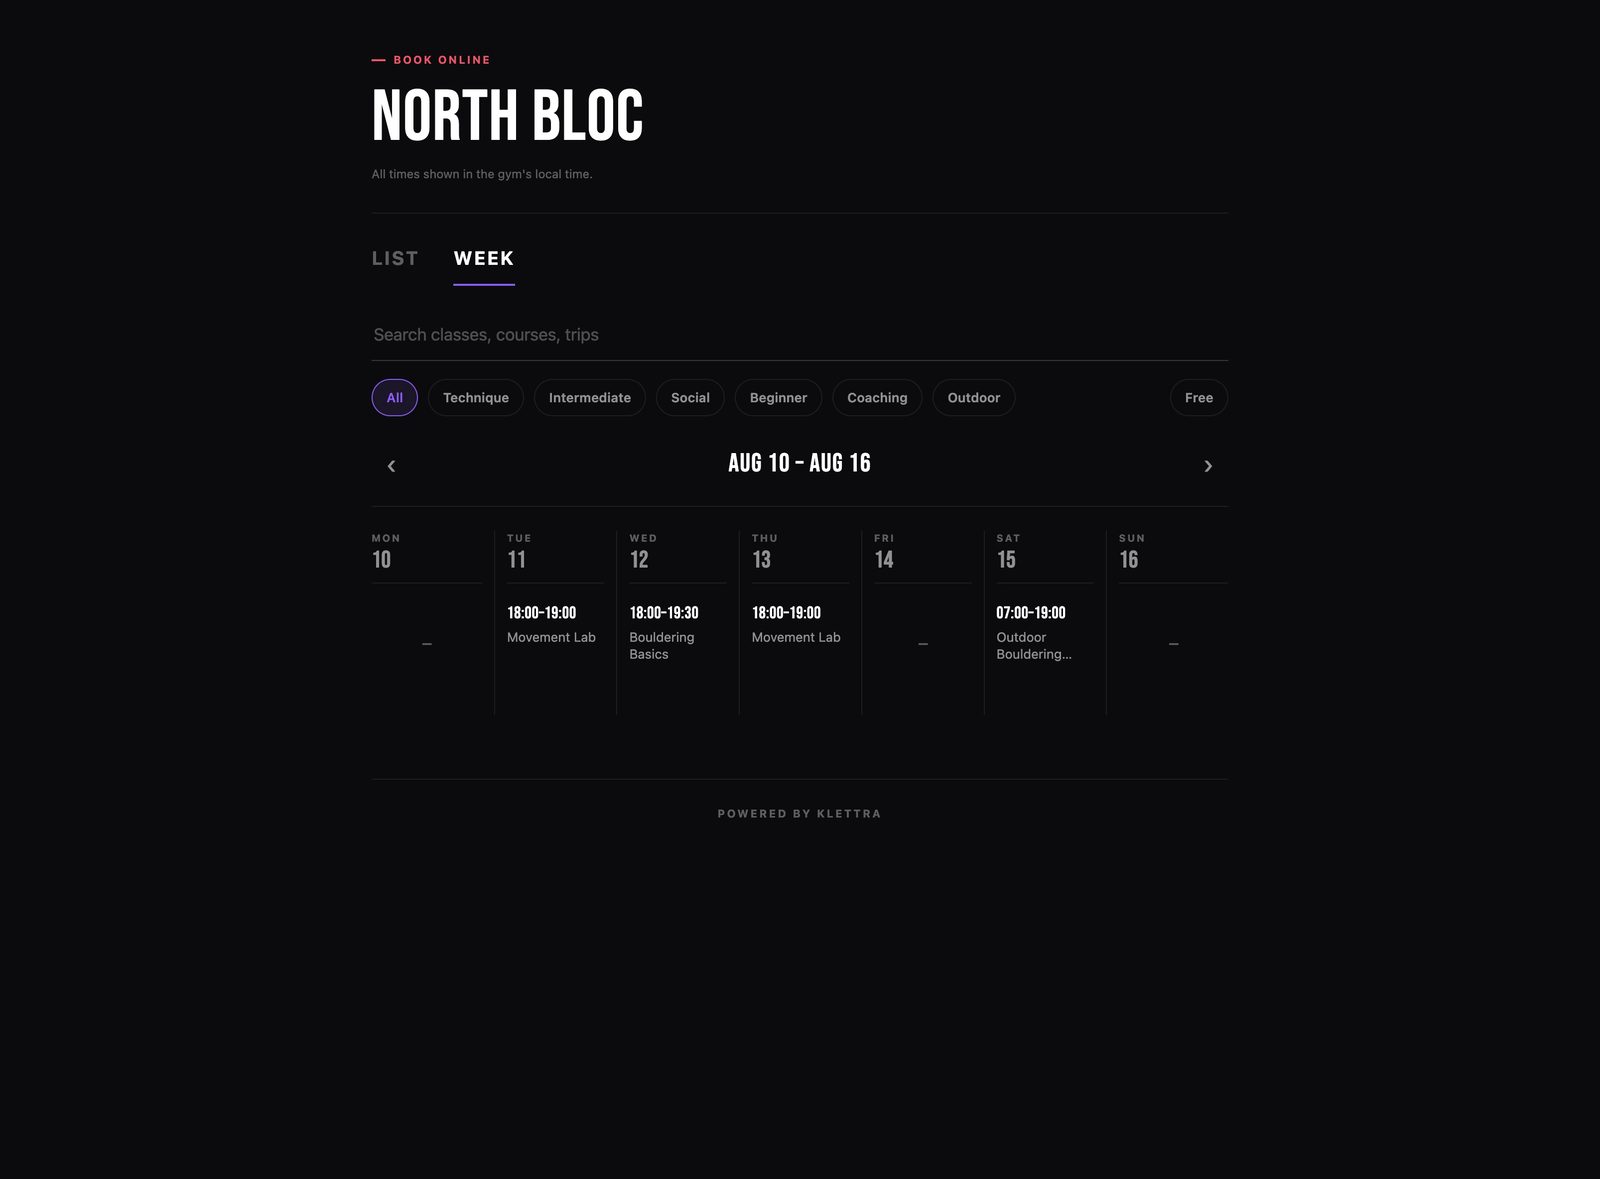
- Step 4
Booking takes only a few details
To book, a climber picks a date, sets how many people are coming, and enters the names. Signing in is a convenience that fills these in for them, but it is never required. Anyone can book with just a name and an email.
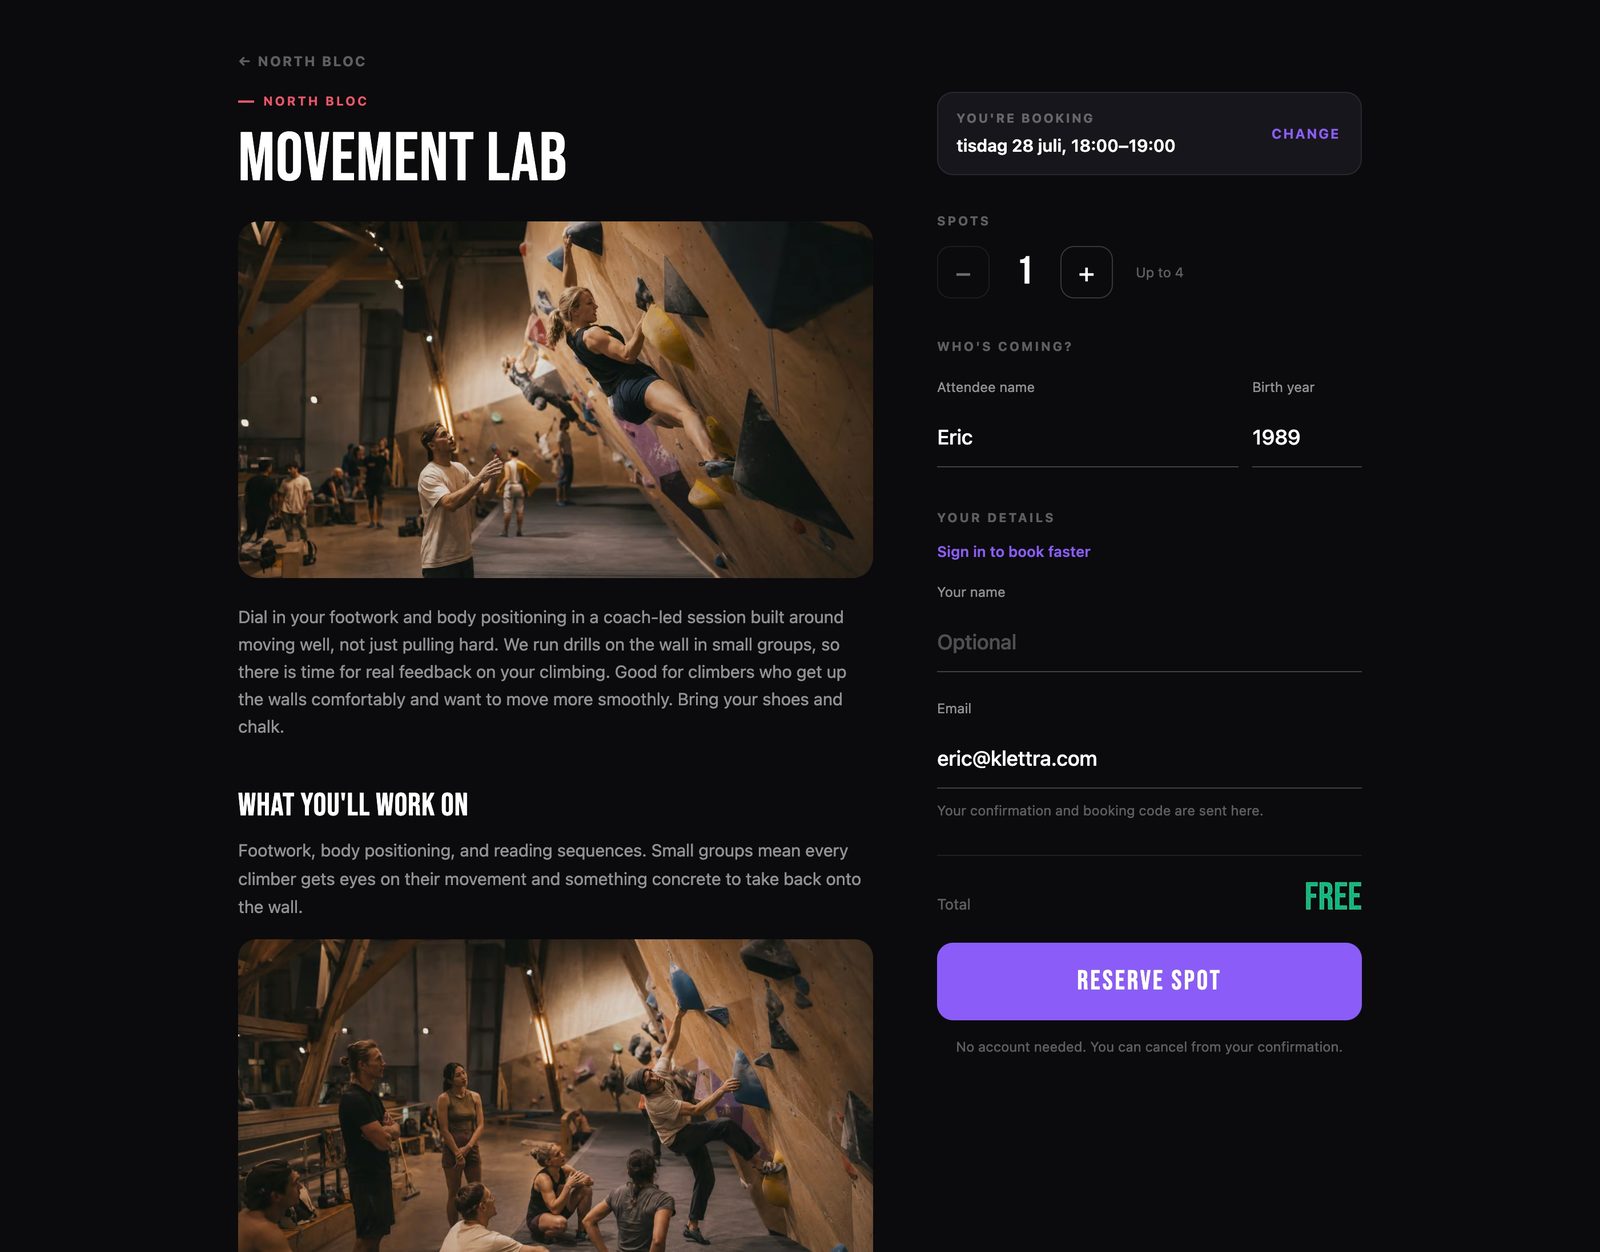
- Step 5
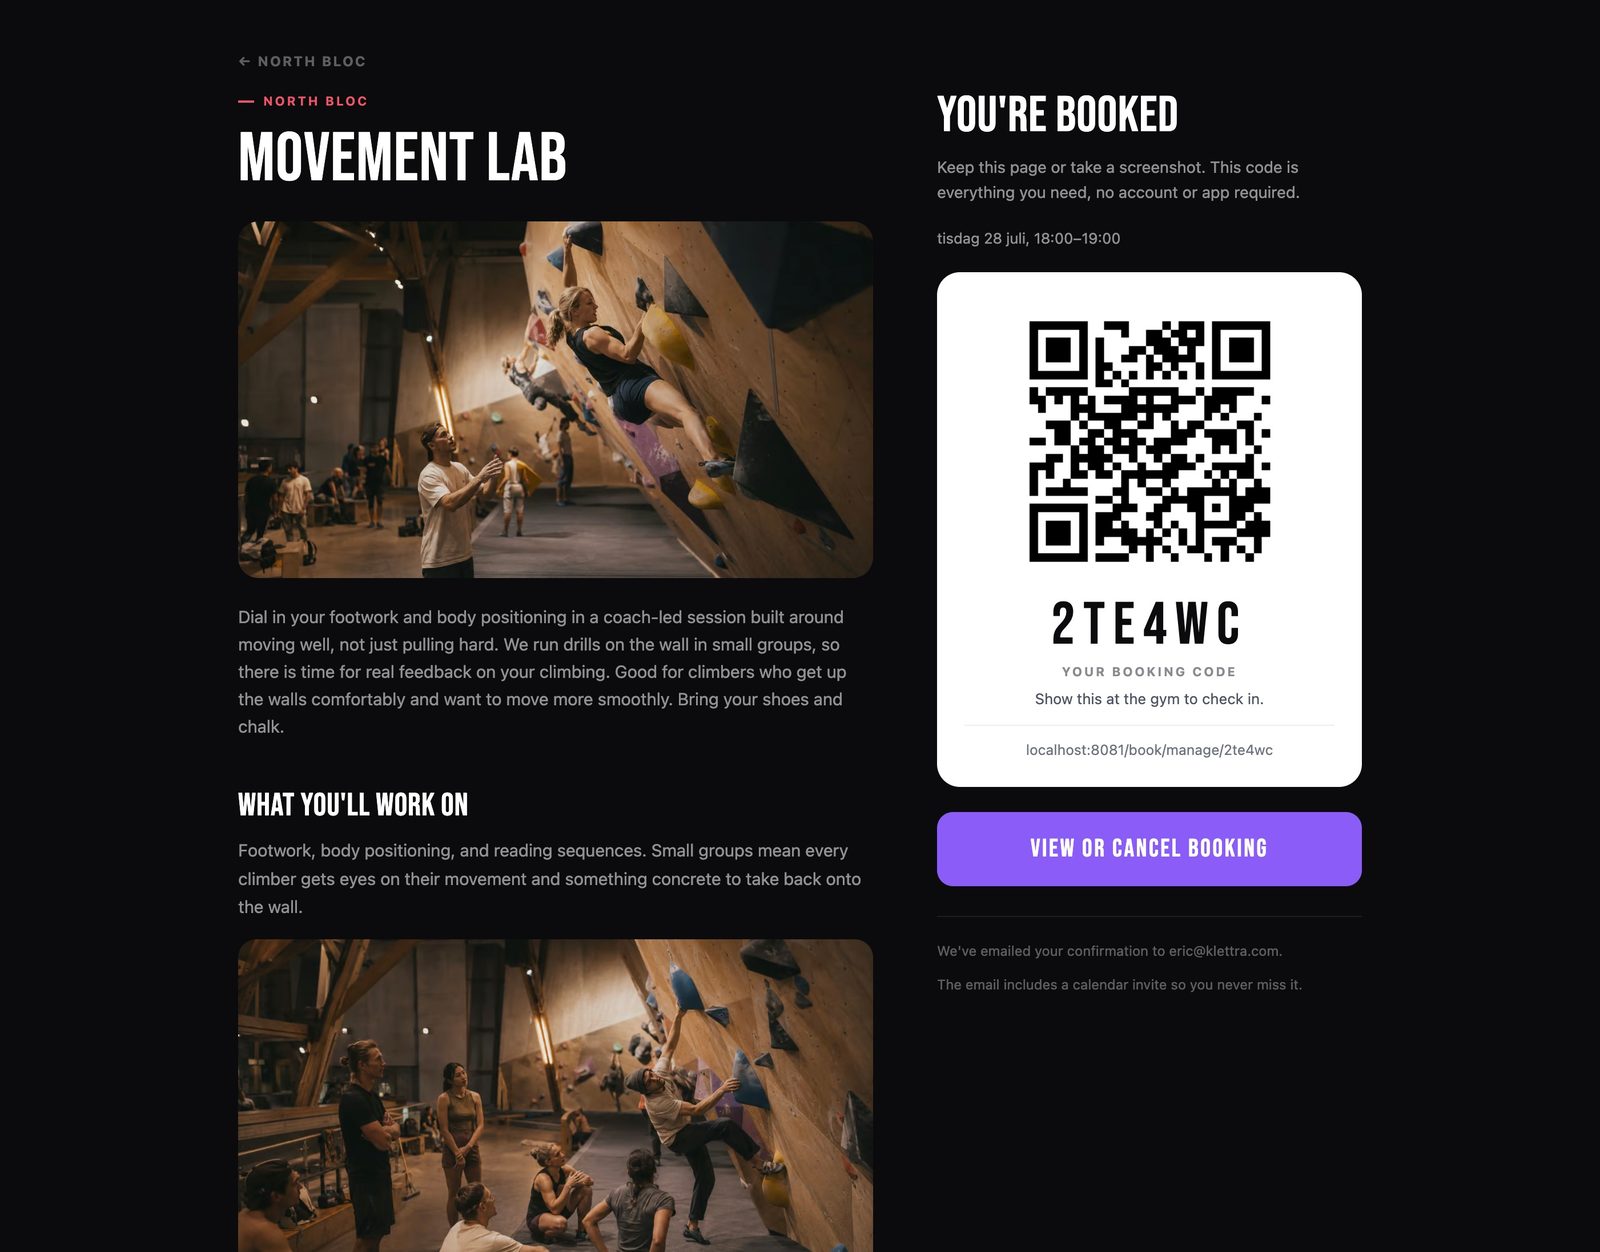
The booking is a code, not an account
After booking, the climber gets a QR code and a short booking code, and that is all they need. They show it at the front desk to check in. No app, no login, nothing to remember beyond the code itself.
- Step 6
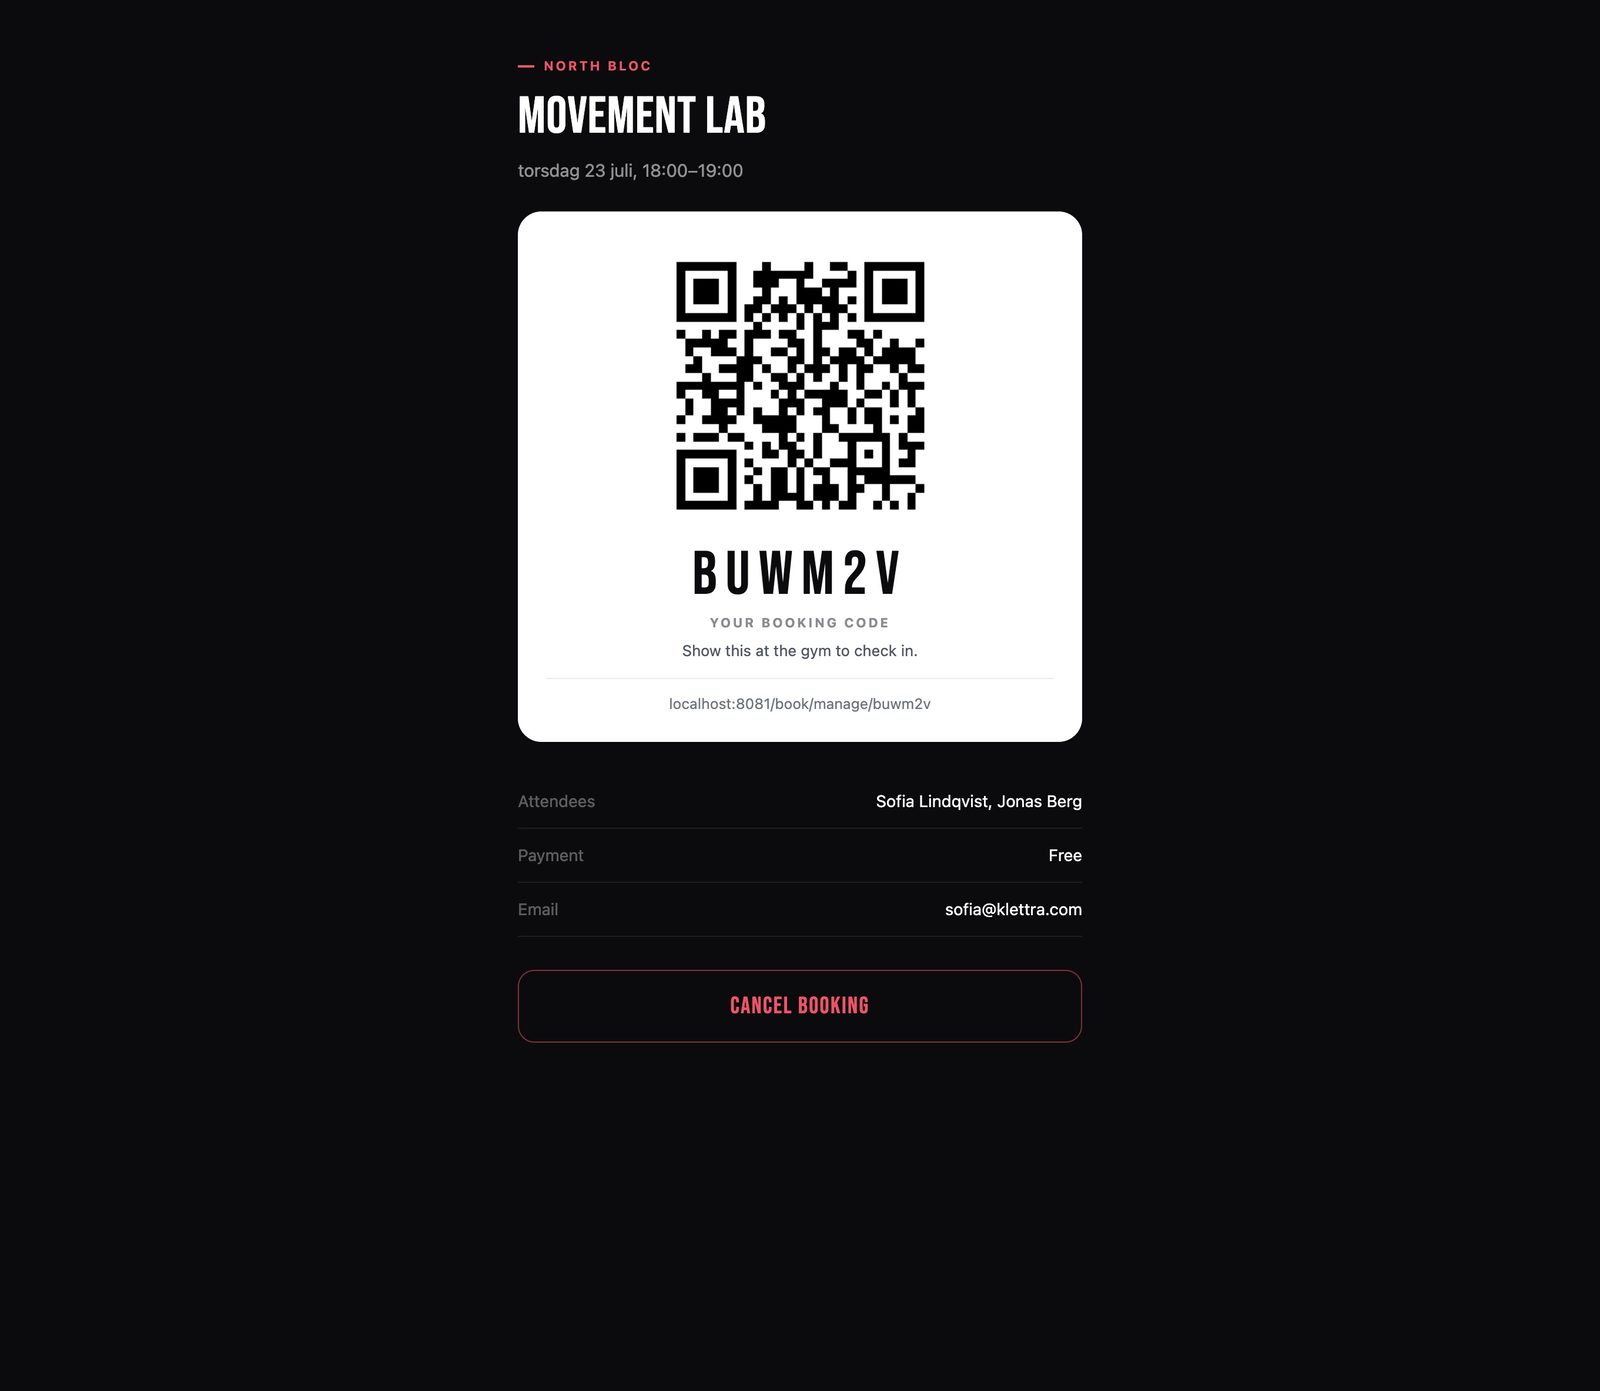
They manage the spot from the code alone
The code opens a manage page with the QR, the attendee names, how it was paid, and a cancel button. There is no sign-in wall, so a climber can check or change a booking from the link in their confirmation at any time.
- Step 7
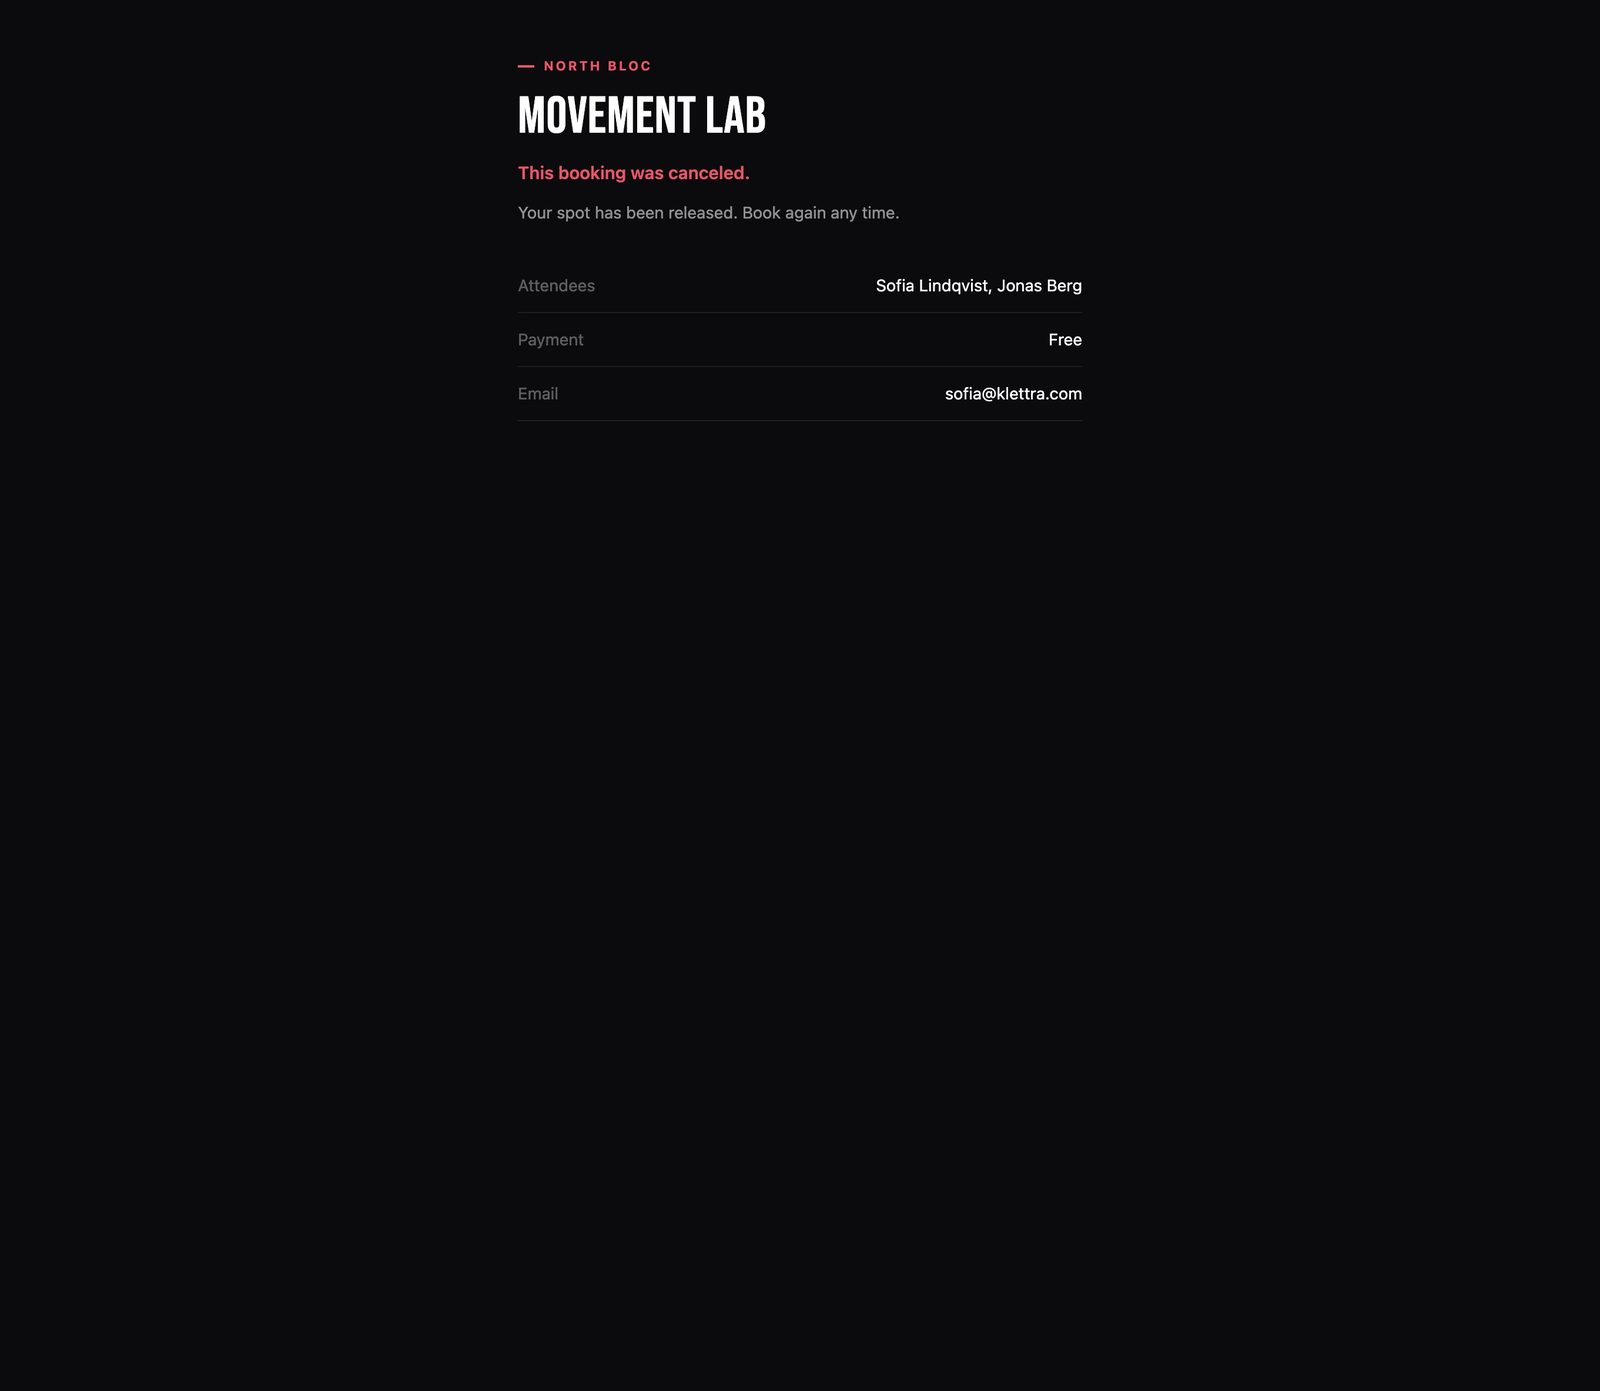
Cancelling frees the spot
When a climber cancels, their place is released back into the session straight away, so it is open for the next person. They see a clear confirmation and can book again whenever they like.
- Step 8
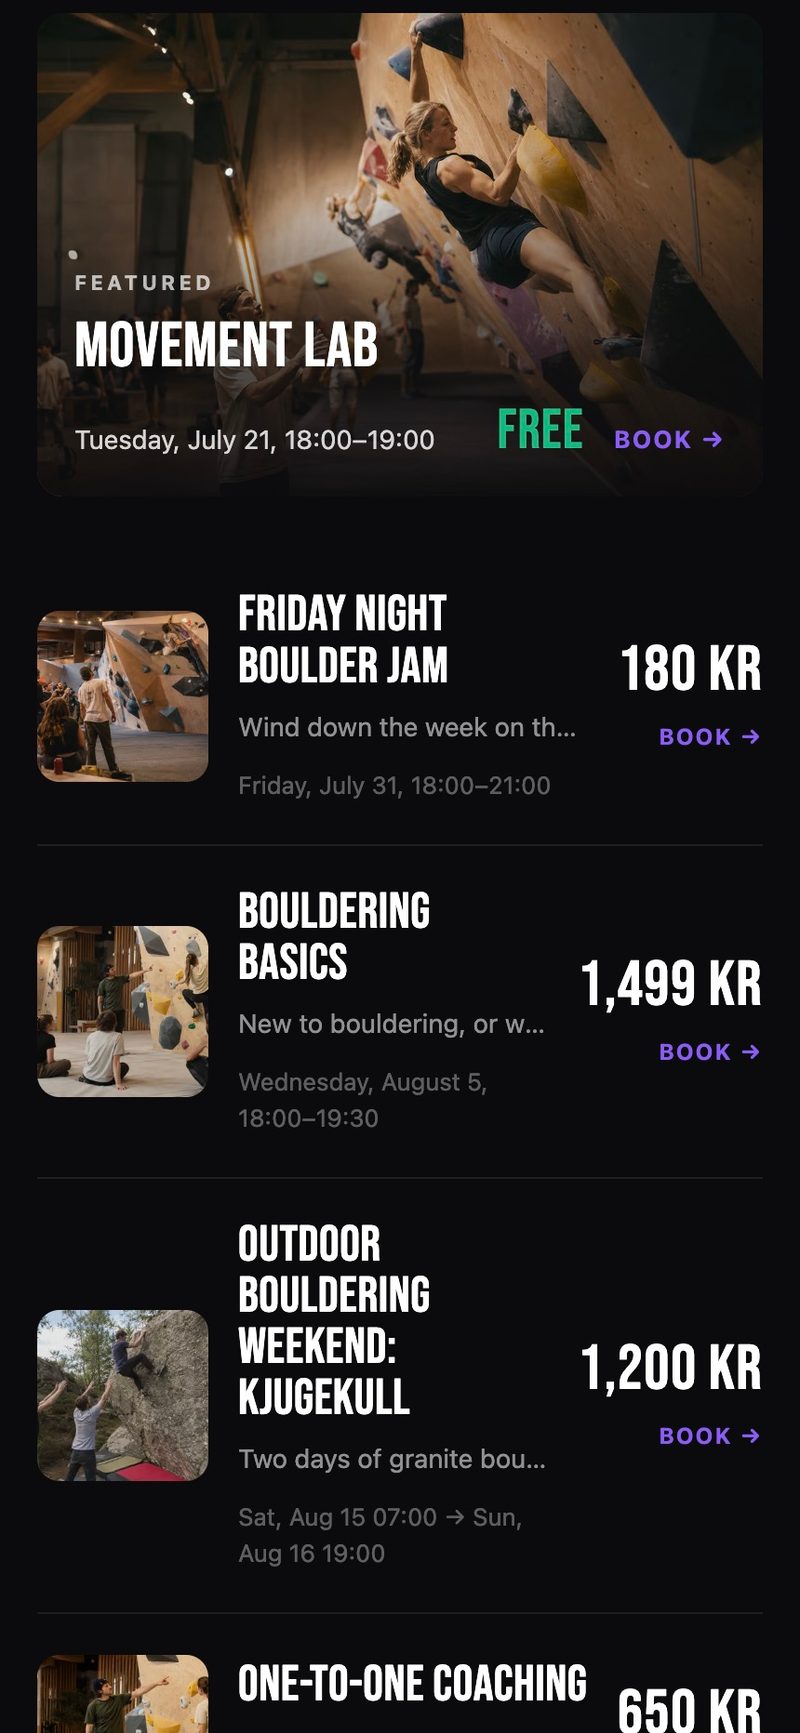
It all works on a phone
Most climbers open your link on a phone, so the whole page reflows to a single column: the featured session, then the list, then booking, all without pinching or zooming.
That is the whole flow
The same few steps set up every kind of booking. Browse the rest of the guides, or see how bookings work end to end.